Home » DIY AT Toolbox: Essential Materials For Making Adaptive Aids
DIY Assistive Technology Toolbox: 30+ Essential Materials For Making Your Own Adaptive Aids
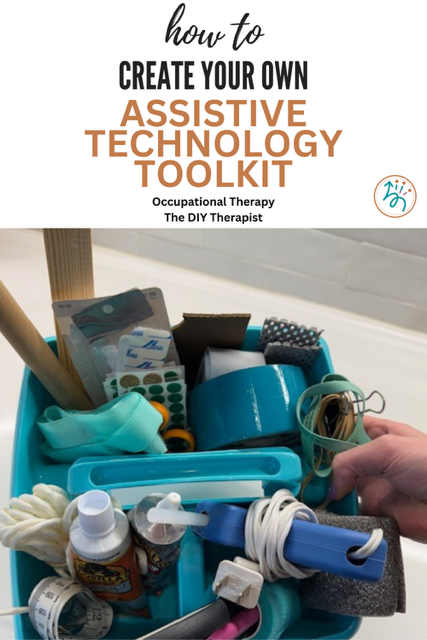
Put together an assistive technology toolbox and create your own custom assistive devices at home using simple, everyday materials. This post provides a comprehensive list of 30+ essential materials frequently needed when making your own personalized adaptive tools at home. Your toolbox will be filled with repurposed and upcycled materials as well as materials found at your local hardware and craft stores. So, grab a storage container and let’s get started.
This content is not intended as a substitute for medical advice, diagnosis, or treatment. Always seek the advice of your physician, therapist, or other medical professional regarding a medical condition or treatment. This content is for informational purposes only.
This post may contain affiliate links. As an affiliate, I may earn a small commission from qualifying purchases at no extra cost to you. Thank you for your support. See full disclosure here.
The cost of adaptive equipment can be a real barrier. Learn how to create your own low-tech assistive technology (AT) toolbox to make creating your own equipment, and your home environment, more accessible and materials readily available. Creating your own low-tech assistive technology can not only save money, but equipment and tools can be customized based on your own needs.
Everyday, DIY low-tech AT can be a powerful tool. DIY assistive technology is:
Personalized
Often upcycled
Budget-friendly
Effective
Helps enhance, maintain, or gain independence in daily living skills
Improves accessibility in daily living
Improves ease of use of various utensils, tools, and equipment
Make everyday tools adaptive to fit your needs
This post provides a comprehensive list of essential, budget-friendly items to include in an AT toolbox that can be readily available when you need to make a new piece of adaptive equipment and/or make your home more accessible.
Each item lists the reason that particular material is needed in your AT toolbox in regards to assistive tech, along with explanations for beneficial uses for each item. Not every item on this list will need to be in your personal toolbox as items in your toolbox should be based on your specific needs and potential uses.
Readers will learn:
A comprehensive list of versatile and inexpensive DIY AT materials.
Creative ways to use common household items for adaptive purposes.
Beneficial uses and how to use individual items.
Where to source these materials in a low-cost way
*As always, discuss with your rehabilitation team, regarding your assistive technology needs, its correct use, and any adaptations you plan to make.
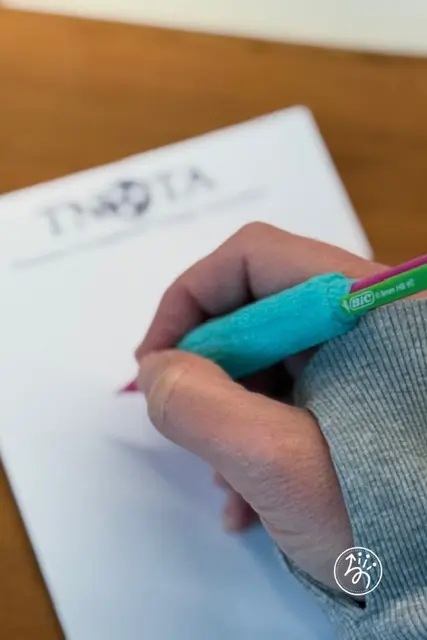
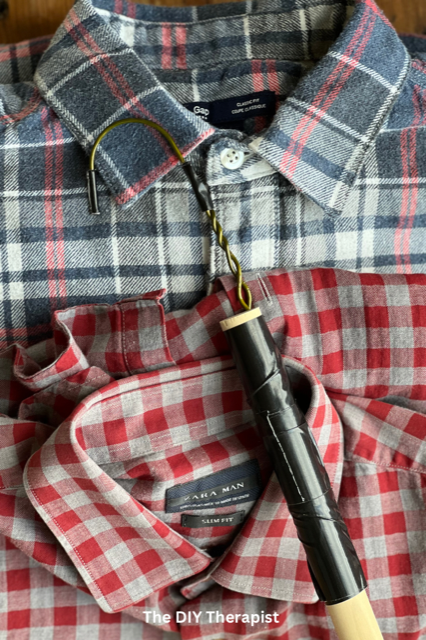
DIY long handled spoon with built up handle.
Why A Budget-Friendly Toolbox Matters For AT
Accessibility
Creating your own assistive technology toolbox will help to make the use of assistive tech more accessible to all without financial and access barriers. Learn to make your own adaptive tools using the tips provided below as well as accessing the various links for step-by-step picture tutorials for specific daily living aids.
Customization
With the help of the step-by-step tutorials found on this site, simple repurposed materials can be turned into customizable daily living aids. Customize adaptive aids based on your own needs. Consult with your personal occupational therapist, physical therapist, and/or speech-language pathologist to discuss ideas for how to make your adaptive tools and equipment more personalized.
For example, customization techniques which can be easily adaptive include:
Add non-slip gripping (shelf liner) material to daily utensils
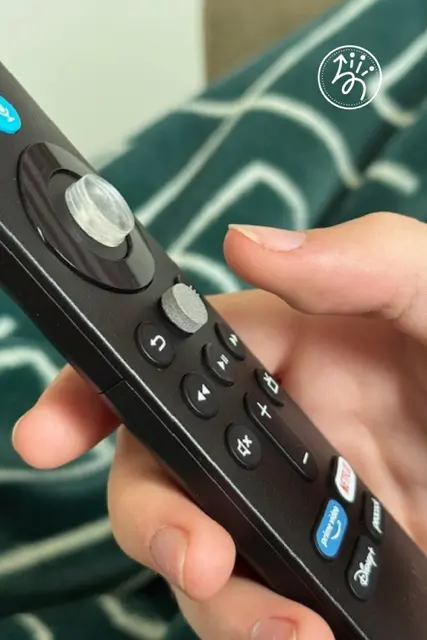
Add enhanced push buttons using cabinet bumpers on remote controls, microwaves, and other devices for a tactile or visual cue and enhanced leverage.
No Time For DIY?
Check out my favorite products page for a list of my favorite occupational therapy sensory support tools and daily living aids. Click the button below to see the full list. Thank you for your support!
Items that you do not have readily at your home can be found in some of the following locations:
Around your home and recycling bin
Ask friends, family and neighbors for unused items such as a shovel handle when making a DIY leg lifter
Goodwill (my favorite place to find and repurpose items)
Dollar Store or other discount stores
Hardware stores such as your local Home Depot or Lowe’s
Craft stores such as Michael’s or Hobby Lobby
Tractor Supply Company or Chewys.com for self adhesive bandage
Online
Foam tubing can be found at The Wright Stuff, a online adaptive aids store
*Before purchasing new items, brainstorm ideas of what else you have in your home that could be used as a substitute. Make sure all used, repurposed items are in good condition. Replace parts and materials as needed. Inspect all adaptive tools and equipment regularly to ensure safety.
AT Toolbox: Materials To Improve Grip And Stability
These materials make fantastic gripping aids to help reduce strain on the joints for arthritis, enhance gripping or grasping needs, make the device more ergonomic, and stress free. These types of built up, ergonomic friendly devices can be helpful for those with fine motor and dexterity differences, neuromuscular diagnoses, during stroke recovery, and arthritis care.
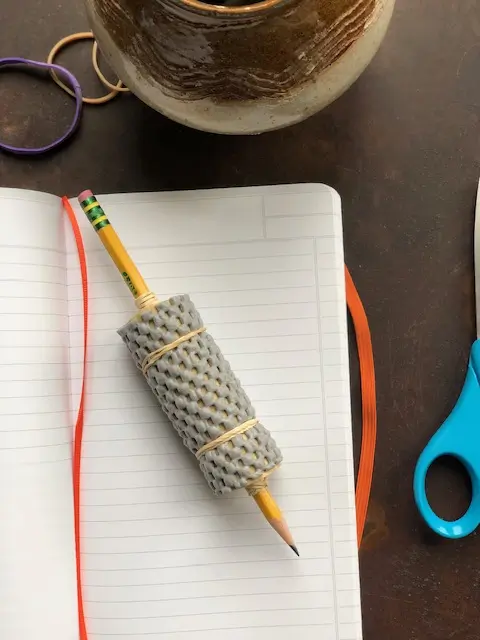
Secure the tubing in place by wrapping a rubberband above and below the tubing. Secure non-slip shelving material with rubber bands as well.
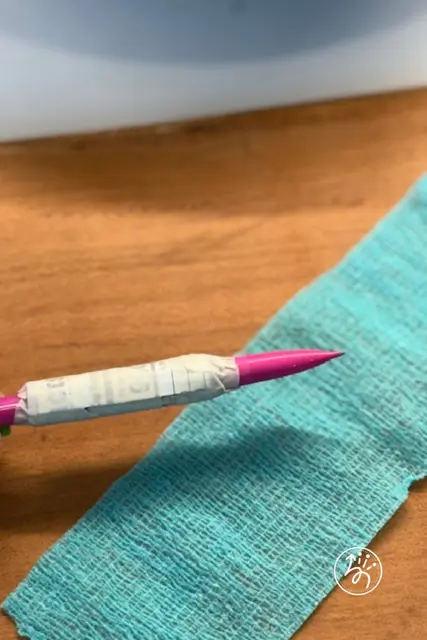
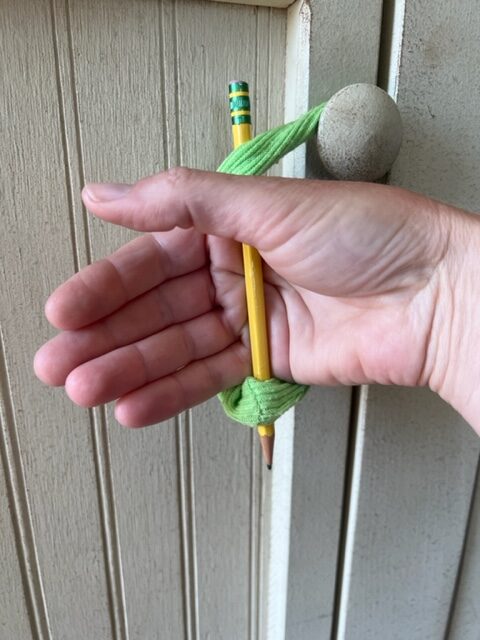
Make it a built up handle using a washcloth and rubber bands. Built up handles decrease stress on the joints by providing a wider gripping surface.
Use foam tubing to create an adjustable universal cuff.
Why it’s great: These materials are easy to personalize by cutting to size, are soft, and provide users with a widened gripping surface around utensils.
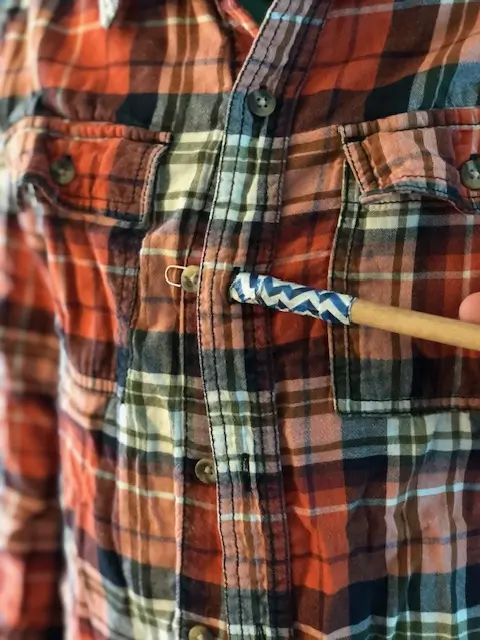
DIY Uses: Build up handles such as writing utensils including pens, pencils, crayons, and markers, as well as toothbrushes, metal eating utensils, combs and hair brushes, and crochet and knitting needles. Add additional cushioning to walker handled or raised toilet seat grab bars to provide a soft, built up gripping surface. Make sure all built up surfaces are secure and will not move when grabbed.
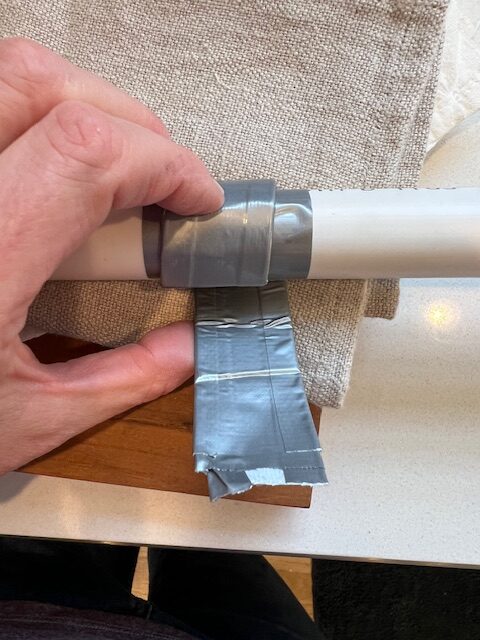
* If the pool noodle or other foam tubing’s center hole is too large to hold a handle, consider wrapping the handle with rubber bands or self-adhering material such as Vet wrap listed below before inserting your handle into the tubing. Secure the tubing in place by using rubber bands above and below the tubing as seen in the picture above with the built up pencil.
Why it’s great: Often inexpensive, provides friction well, and helps to stabilize plates and cups. Used yoga mats can be found at your local thrift store. Adds a non-slip gripping surface as well as keeps plates and bowls in place while eating. Rubber bands can be used to add texture and traction to the sides of cups by wrapping a rubber band around a cup.
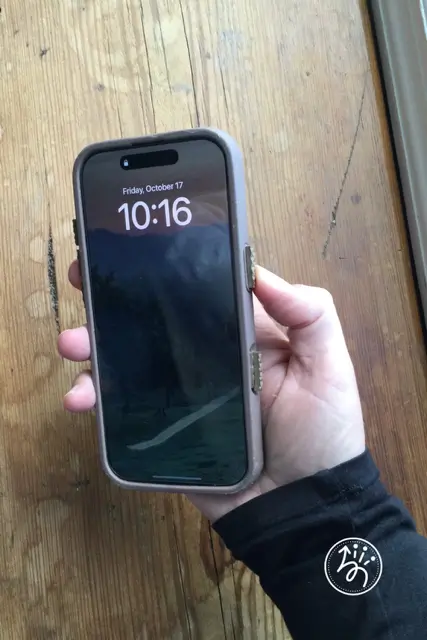
DIY Uses: Use under plates, cups, and bowls to decrease slippage while eating. Also use on utensils by securing with rubber bands, duct tape and even glue around handheld devices such as on toothbrushes, utensils, cups, and even glued around the edges of a phone case. If needed, customize your handheld devices further with built up foam tubing (listed above) or a washcloth wrapped with a non-slip material. Use a 4×4” non-slip shelving material to open a jar. Rubber bands can be used on certain non-slip surfaces to help add traction.
Check out some of these DIY daily living aids links:
For a wider built up surface while saving self-adhering bandage wraps for other projects, first wrap the device with cardboard, secure with tape, and wrap with self-adhering bandage. Cut to size as needed.
Create a soft spongey built up gripping surface using self-adhering bandage wrap. I find Syrflex Cohesive Bandage, also known as vet wrap, at our local Tractor Supply Store. Add more or less of the self-adhering bandage based on your own needs.
Self-Adhering Bandage Wrap
Syrflex Cohesive Bandage, also known as vet wrap found at your local farm supply store such as Tractor Supply, Chewy’s, or online
Coban, easy to find online
Why it’s great: Inexpensive and great adhesive abilities, self-adhering bandage can be used in a variety of ways including building up handles, creating a non-slip surface such as on a DIY leg lifter, on refrigerator or door knob handles.
DIY Uses: Built up handles such as on pens and pencils, hairbrushes, paintbrushes, and comb handles. Add to drawer pulls and build up zipper tabs as well as build up cord plugs such as iPhone chargers. Add self-adhering bandage wrap on-slip gripping surfaces such as on a DIY dressing stick to improve grip stability. This type of specialty wrap is also used on the DIY leg lifter.
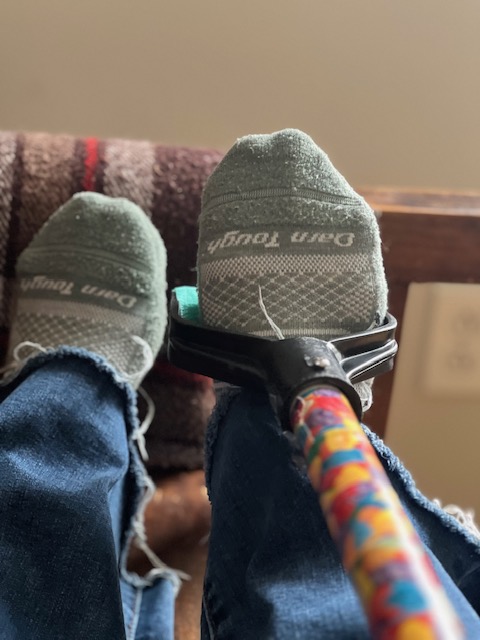
Enhance grip by adding rubber band(s) to grasping surfaces such as writing utensils, cups, toothbrushes, hairbrushes, paintbrushes and screw drivers.
Rubber Bands
Why It’s Great: Wrapping rubber bands around device and/or handled utensils such as a toothbrush can create a non-slip gripping surface
DIY Uses: Add to utensils to create a non-slip surface on items such as toothbrushes, paintbrushes, and knitting needles. Rubber bands can also be used for exercises for hand strengthening.
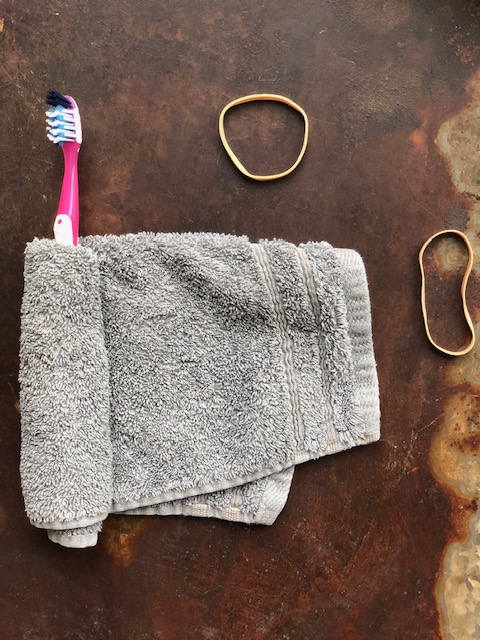
Materials needed to make a diy built up handle using a wash cloth.
Washcloths
Wash cloths and/or torn or cut towels and other soft fabrics such as an old t-shirt (wrap around a utensil and secure with rubber bands or duct tape)
Why it’s great: These materials are typically found at home, and can be repurposed very easily to enhance into adaptive tools.
DIY uses: Create a built up grasping surface on a variety of daily utensils such as spoons and forks, toothbrushes, pens and pencils, and hairbrushes as well as paintbrushes and crochet needles.
Assistive Technology Toolbox: Materials For Connection and Extension Tools
Zip Ties
Why It’s Great: Strong, inexpensive, and often found in homes
DIY Uses: Zip ties can be used to make adaptive self-opening scissors, to securely attach a utensil to a dowel rod, create loops for finger placement, and add to often used lid tops for easier opening.
Create a loop at the end of handles to place your wrist through such as when making a long handled sponge, leg lifter, or a dressing stick. Picured is the handle to the long handled sponge.
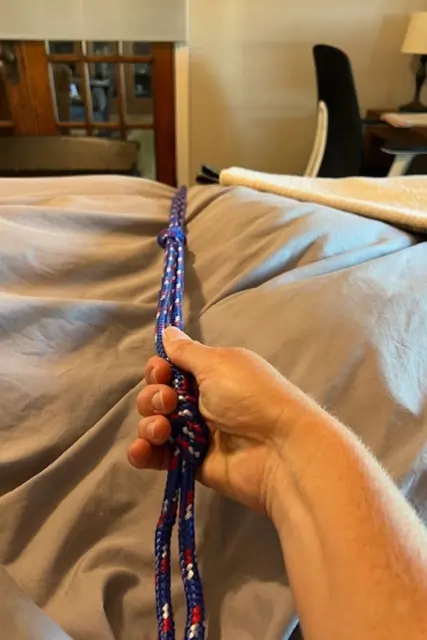
Make your own DIY bed ladder using a strong rope. This tutorial only take minutes to make and enhances independence in bed mobility.
Make your own DIY sock aid with pull cords so that the user does not have to reach to their foot to put on socks. This device enhances independence in dressing skills.
Rope, Cording, and/or Paracord
Why it’s great: Durable and often accessible around the home.
DIY Uses: Create loops to slide the wrist through, DIY bed ladder, and attach pull cords such as when making a DIY sock aid or long handled sponge, or attach to devices that are often dropped for easy pick up.
Quickly make your own simple DIY universal cuff using a scrunchie.
Using cabinet knobs to place the scrunchie universal cuff on one handed.
Use scrunchies and hair ties to make your own handiwriter and handwriting aid that helps to improve pencil grip, pulling the pencil back into the webspace.
Scrunchie
Why It’s Great: Easy slip-on, soft, and cozy as well as inexpensive, and often found around the home
DIY Uses: Quickly make your own universal cuff grasping aid when you are in a bind and do not have your regular, more stable universal cuff. Attach eating utensils, toothbrushes, and hairbrushes to your hand in a second. Tips for putting on the scrunchie universal cuff one-handed as well. A scrunchie can also be used as part of a handwriting tool, the Handiwriter.
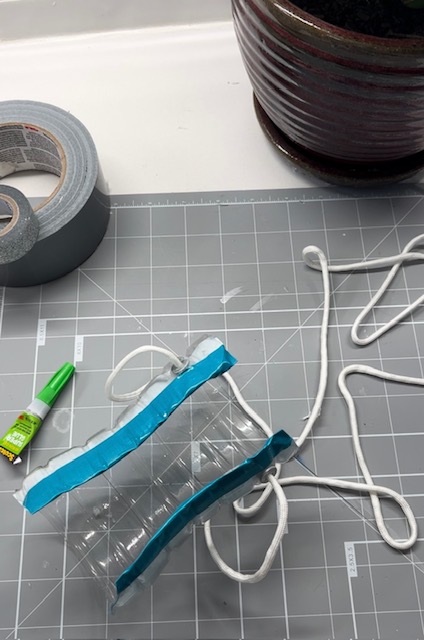
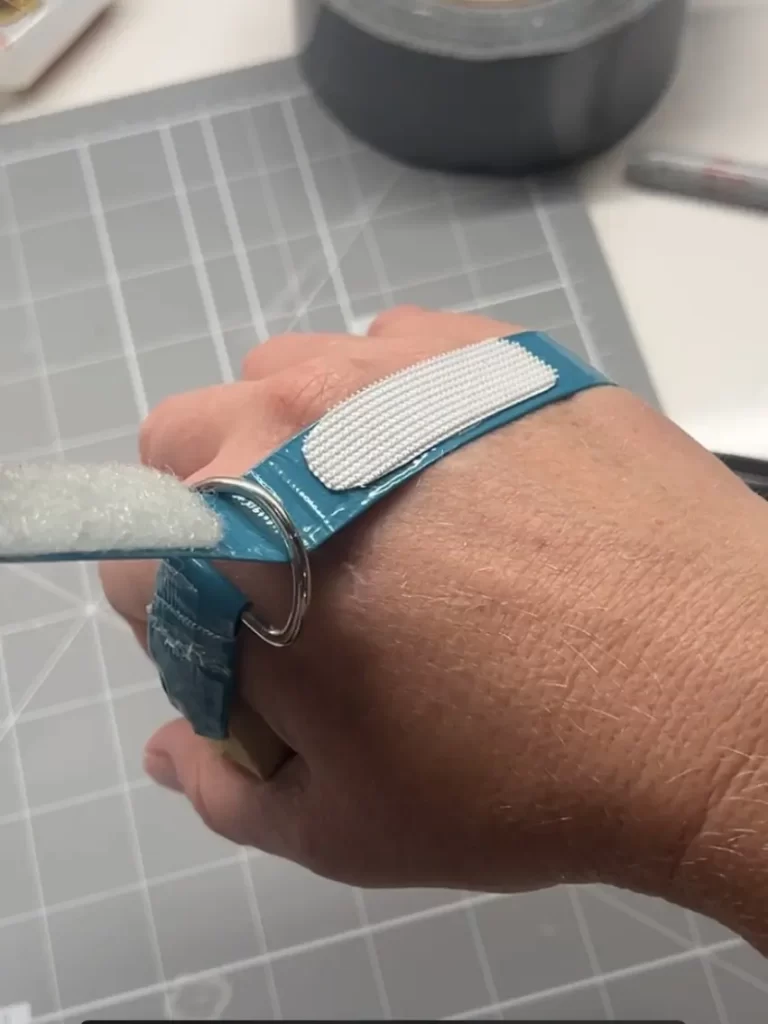
Make your own adjustable universal cuff using Velcro, duct tape, and foam tubing.
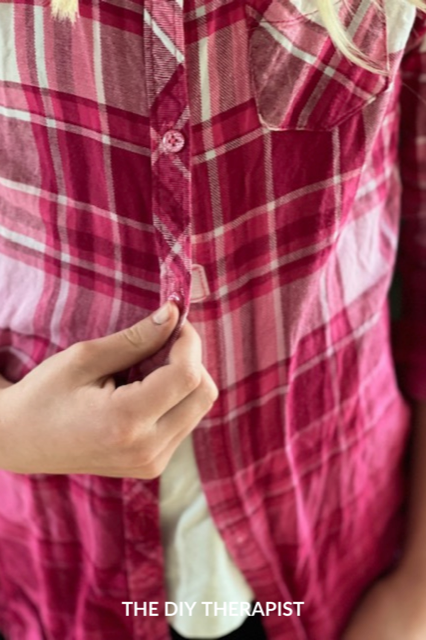
Use Velcro to replace buttons to make adaptive clothing.
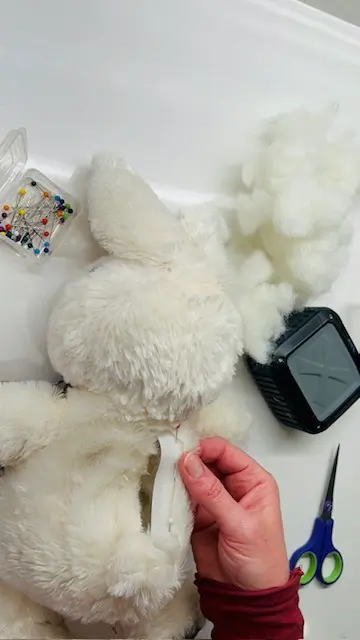
Use Velcro to make a DIY reminiscence music therapy teddy with removable speaker hidden inside the stuffed animal.
Velcro
Why It’s Great: Inexpensive, easily make loop handles as a universal cuff, customizable, adaptive clothing adaptations.
DIY Uses: Use strips of Velcro to attach a spoon or other utensils as a universal cuff. The handled loops make it easier to maintain grasp with a Velcro adjustable strap. In addition, add to a dowel rod when using long handled devices and secure to hand with adjustable Velcro strap. Velcro can also be used in place of buttons for easy closure shirts. Hook and loop Velcro is also helpful in making adjustable universal cuffs and adaptive shirts.
Wrap duct tape around a strip of cardboard and secure to device as a built up surface to enhance grip.
AT Toolbox: Repurposed Household Materials
Cardboard and Cereal Boxes
Why It’s Great: Eco-friendly reuse of cardboard, accessible, and multi-use applications
DIY Uses: Use to create build up surfaces and secure with duct tape as needed to make your own adaptive game card holders, create desk organizers, bookmarks, and reading guides. Build up specific areas of handles or long handles devices as seen in the dressing stick tutorial pictured above. Wrap a rectangular of cardboard to a pencil to create a built up surface, secure with duct tape, and wrap with self adhesive bandage for a cushioned feel.
Why It’s Great: Inexpensive and durable, secure parts of adaptive tools, create built up handles
DIY Uses: Create straps for universal cuffs and adaptive game card holders, built up handles on utensils, attach materials, create loops, use as visual cues, and enhance gripping surfaces. Duct tape is most often my preferred tape of choice when creating DIY assistive tech.
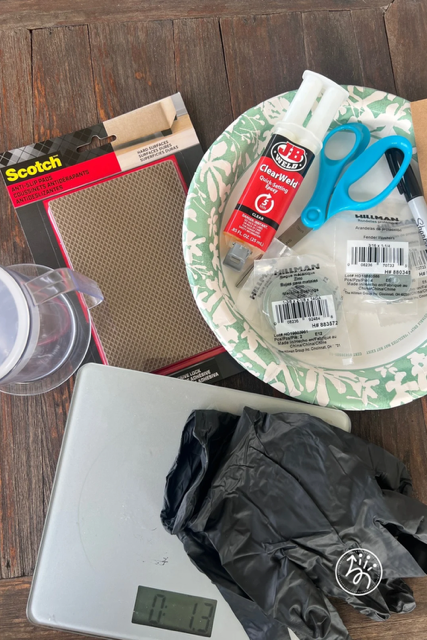
Why It’s Great: Because it’s glue! Keep a variety of adhesives available in your toolbox as certain materials that need glued, need a specific kind of adhesive.
DIY Uses: Epoxy works well for those hard to glue areas such as when making a DIY long handled sponge or a weighted cup. While on the other hand, super glue worked well to stick a non-slip shelving liner to the backside of a sock aid.
Use a paper clip, dowel rod, and duct tape to create your own button hook. These handy little tools are great for one handed buttoning.
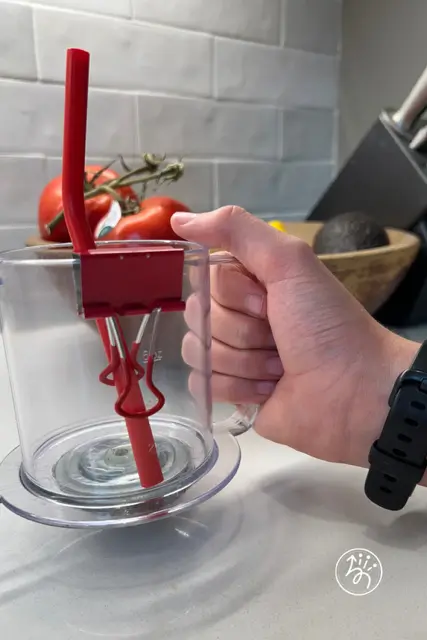
Use a binder clip to create a stabilized straw. The bottom of the cup has added weights to create a weighted cup making it more stable.
Heavy Duty paper clips and Binder Clips
Why It’s Great: Binder clips are a great fine motor strengthening tool. Binder clips and paper clips can be used to hold items in place while glue is drying.
DIY Uses: Use to hold items together while adhesive is drying, create fine motor activities using binder clips, make a DIY button hook using a paper clip (LINK), and DIY drinking straw holder using a binder slip.
Why It’s Great: Great, must-have material! Non-slip shelf liner creates a non-slip surface, and is reusable
DIY Uses: Wrap around jar lids to help open jars and under plates to keep a plate or bowl from sliding. The shelf liner can also be used to create a built up device and add friction to the back of a sock aid.
Include a Sharpie or other felt-tip marker as a part of your AT toolbox. Of course Sharpies work well for marking on a variety of materials when you are in the process of DIY-ing assistive technology.
Personal Safety Wear
Use personal safety protection when working with certain materials such as epoxy. Always wear gloves when working with adhesives such as super glue and epoxy. Also when using epoxy, mix it outside preferably while wearing a mask and gloves.
Making your own low-tech assistive technology can be empowering and easily personalized to fit your needs. Collect items from around your home, ask friends and neighbors for items and collect items locally from your local thrift, hardware, and craft store to add to your AT toolbox. Creating a toolbox with items frequently used makes creating simple DIY AT more accessible and readily available when needed to make your home and daily living aids more accessible and easier to use.