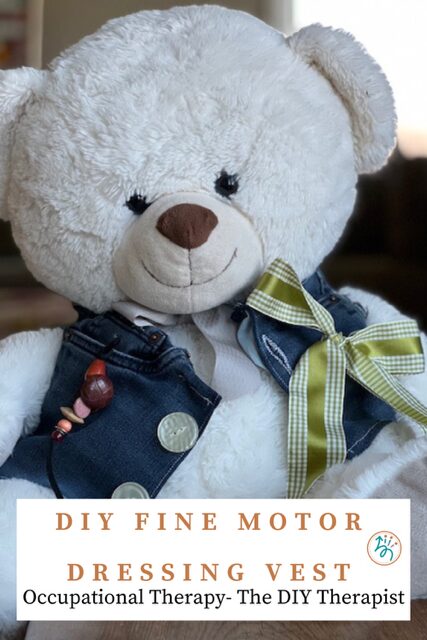
Follow this tutorial and learn how to make your own adorable fine motor dressing vest for kids and older adults to learn or maintain dressing skills. With step by step pictures, and easy to follow directions you’ll have this adorable fine motor dressing vest done in no time.
This content is not intended as a substitute for medical advice, diagnosis, or treatment. Always seek the advice of your physician, therapist, or other medical professional regarding a medical condition or treatment.
This post may contain affiliate links. As an affiliate, I may earn a small commission at no extra cost to you on qualifying. Thank you for your support. See our full disclosure.
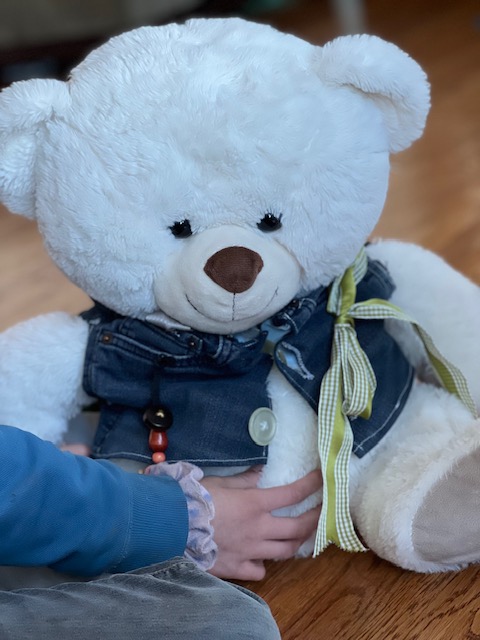
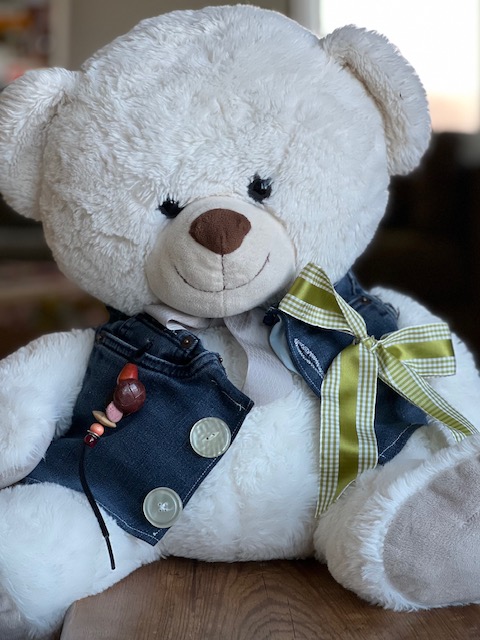
This teddy bear dressing vest is not only functional, but its cute upcycled, made-of-old-jeans darling little vest is a fine motor playground. While playing with this little guy, the loved one in your life will work on fine motor skills such as buttoning, tying, stringing beads, manipulating Velcro, shape and color identification, and also practice putting on and taking off clothing.
By adding your own creative spin specifically focusing on the fine motor skills which need addressed, this dressing vest can be individualized for the loved one in your life. Attach a zipper, various sized buttons, or even snaps. Add a bit of your own flare – make it personalized with favorite colors, cute buttons, and even patches.
What Is The Difference Between A Fine Motor Dressing Vest And A Fine Motor Lap Pad?
Dressing vests encourage practice in dressing skills. Children don the dressing vest then work on manipulating buttons and zippers while wearing the vest. Versus a dressing lap pad is a board that has fabric attached along with buttons and a zipper for children and adults to work on from their laps. Both can be beneficial and useful in occupational therapy sessions and while working on dressing at home.
The difference between these types of fine motor buttoning devices mentioned above, and the one I made today is this cute teddy bear vest brings pretend play to the table. Unknowingly, kids will work on fine motor skills such as manual dexterity, bilateral coordination, and the pincer grasp all the while playing with a cute little teddy bear. Plus the teddy adds comfort and engagement during this activity for both kids and adults all the while participating in a fine motor task.
Make It A Weighted Stuffed Animal
Interested in adding a sensory component to your dressing vest? Add an easy to make DIY weighted stuffed animal following this quick tutorial. Choose a favorite soft and cuddly stuffed animal, and upcycle it using the instructions on the tutorial.
No time to make a weighted stuffy? Fun and Function offers a soft and cuddly weighted teddy bear among other stuffed animals friends. Make the dressing vest to fit the weighted stuffed animal once it arrives. Play dress up, carry it around, let it rest on the lap for an added deep pressure and heavy work component. Click the button below for more info. Thank you for your support!
Practice manipulating buttons using the button stacker.
Work on buttoning skills
Dressing Skills And Pediatrics
As a pediatric occupational therapist, I love new and fun ways to work on dressing skills. Often, kids can become bored when working on buttoning, zippers, and shoe tying. Whereas this fine motor buttoning tool, makes the chore of practicing these types of dressing skills much more fun and playful for kids.
Dressing Skills And Older Adults
Gaining or maintaining independence in self care tasks and activities of daily living can make a huge difference in someone’s life whether after an injury, stroke, or memory loss. Using this manual dexterity dressing vest can make the mundane task of buttoning and shoe tying practice more fun and engaging. For older adults living with early stage dementia, encouraging practice in self care tasks can help maintain independence for longer. Plus, having a soft, cuddly teddy bear can provide a sense of comfort and nostalgia, and also can be used as a fidget to help keep hands busy.
Work on pretend play skills.
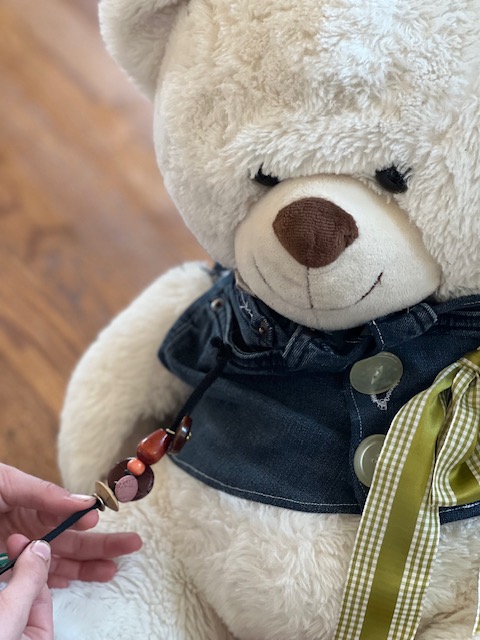
Work on the pincer grasp while putting beads and buttons on and off the shoe lace.
Occupational Therapy Fine Motor Focus
This vest not only works on buttoning, tying skills, Velcro, and stringing beads all on a cute little playful vest, but at the same time you will also be working on the pincer grasp, manual dexterity, bilateral coordination, and visual motor integration skills through play with this project. Here are some of the skills addressed while working through the different tasks on this vest:
Pretend play
Don/doff clothing
Manipulate buttons
Shoe tying
Manipulate Velcro
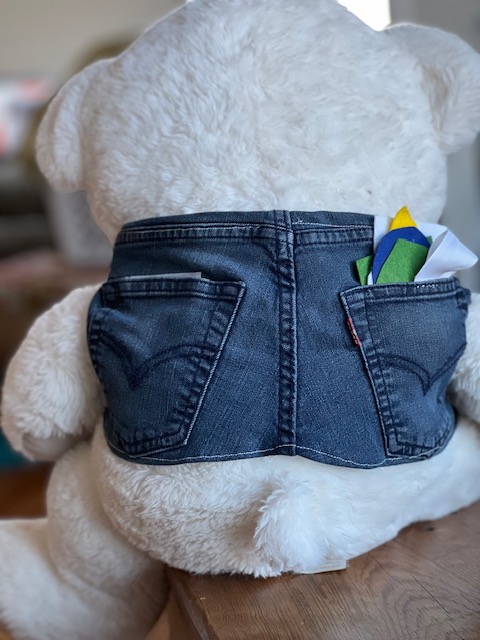
Place items in/out of the pocket
Stringing beads
Shape and color identification using the felt buttoning pads
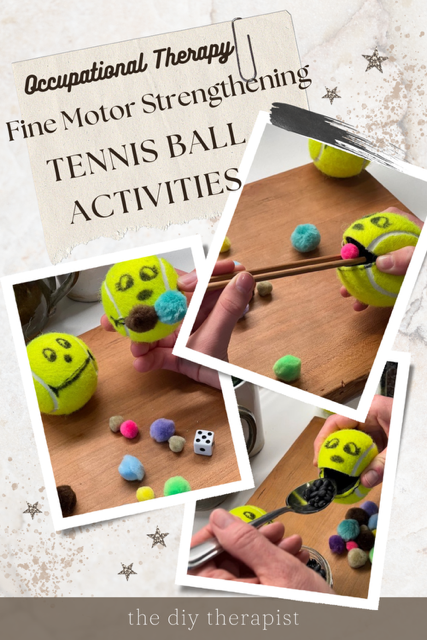
Fine motor strengthening
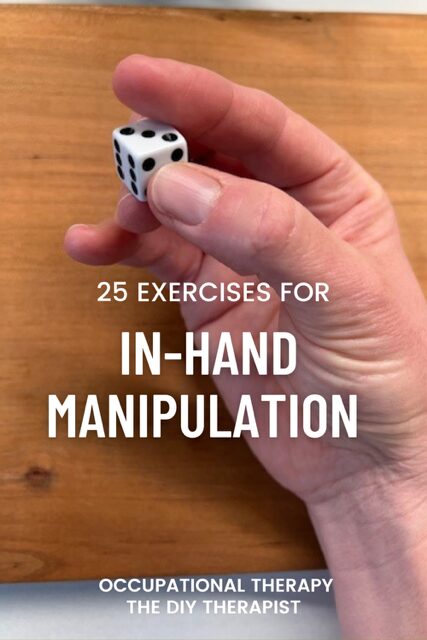
Pincer grasp – The pincer grasp uses the pads of the index finger and thumb to grasp objects. Furthermore, this type of grasp is important for handwriting skills, picking up small objects, and dressing skills such as manipulating buttons and zippers.
Manual dexterity– Manual dexterity is the ability to use your hands in a skillful way to grasp and manipulate objects such as when playing a string instrument and knitting. This fine motor skill is needed to manipulate buttons, move the individual fingers to write letters legibly, and participate in skilled tasks such as sewing and braiding.
Bilateral coordination– Bilateral coordination is the ability to use both sides of the body together in an activity. This is an important life skill needed for completing tasks and activities throughout the day. For example, bilateral coordination is needed for food prep (ie: peeling potatoes and mixing a bowl of dough), buttoning, sports, and school-based skills such as scissoring.
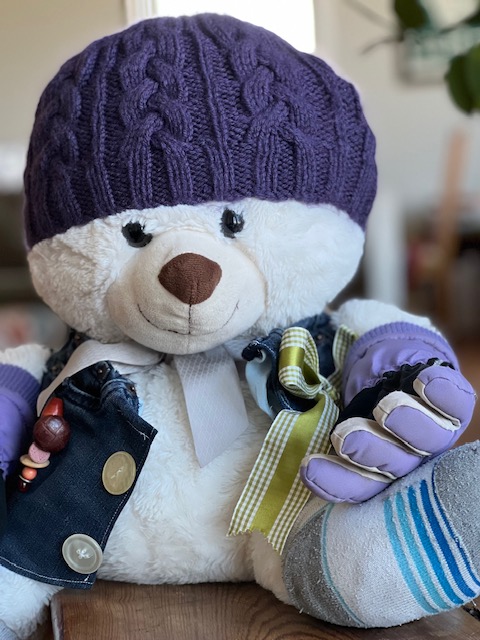
Practice additional dressing skills by adding a hat, socks, and even gloves.
Other Ways To Use This Fine Motor Dressing Vest
Play dress up with your teddy bear. Take the vest on and off. Add socks to its wardrobe, or possibly a cute hat such as a beanie, wrap a small scarf around its neck, or even a small baby/toddler sized jacket.
Important Things To Consider Before Starting This Project
This project is specifically for children over the age of 3 years. The dressing device can be a choking hazard for children under the age of 3 or for anyone who may chew on non-food items.
The teddy bear I used in the photos measures 22 inches from head to foot with a 25 inch girth. I used a pair of jeans that no longer fit my son which are a size 10.
I did not sew over any seams that were too thick for my sewing machine. Instead, I back stitched before and after each thick seam, and did not sew directly over the seam avoiding breaking a needle.
Buttons can be purchased or pulled off an old sweater or jacket (the clothing can be kept and upcycled for another project)
Add a zipper if you like to the front of the vest. Purchase the size zipper you need before starting this project so that you cut your vest to the correct length. I had difficulty finding a zipper less than 7” locally. Looking online might be best depending on your area.
If you decide to add a zipper, make sure the zipper is easy to align and is also easily engaged.
Add additional fine motor components such as snaps, a zipper, and various size buttons.
How To Make A Fine Motor Dressing Vest For a Stuffed Animal
Materials Needed
Sewing machine
Thread
Ribbon (1 piece 32” long, and another piece 6” long
3-4 Buttons or fasteners of choice (for the front closure and one button for the buttoning felt stack in the back)
Velcro with self adhesive backing
Various colors of felt (found at your local craft store)
Scissors
Clothes iron and ironing board
Teddy bear or other upright stuffed animal
Old pair of jeans
Shoe lace
Additional small buttons or beads for the shoelace stringing task. I used beads with larger button holes and shank-style buttons (buttons that have a loop on the back side instead of holes) that fit around the shoelace snugly and do not fall off without being pulled.
X-Acto knife for cutting openings for buttons on felt shapes (optional) and a thick piece of cardboard to protect the table.
Instructions
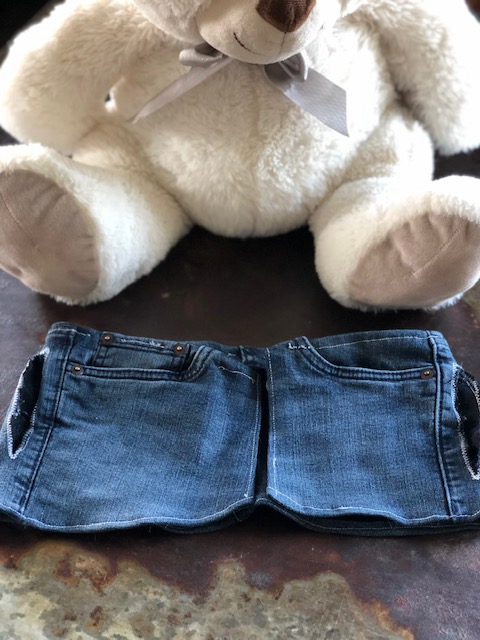
Fold and sew in the place all cut edges as seen in white thread.
Another view of the sewn raw edges. Notice arm hole placement.
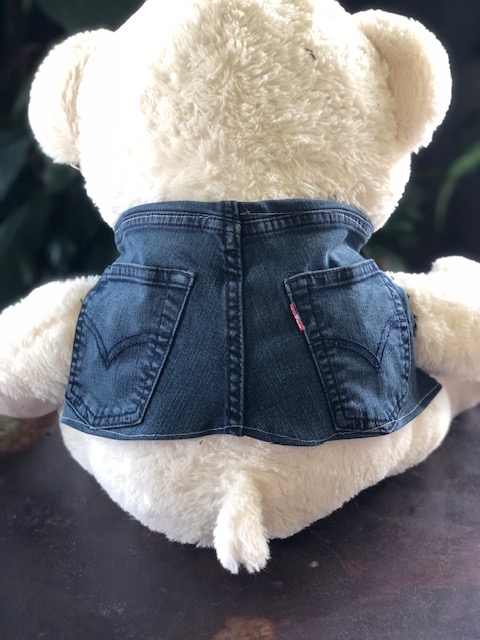
Back side of dressing vest
Cut And Sew The Main Vest
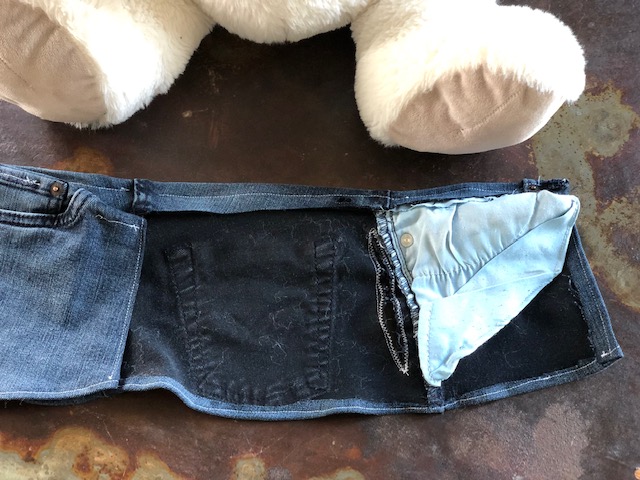
Lay the jeans flat. Approximately 1” below the back pockets, cut a straight line through both sides and of the jeans. Discard the legs or save for another project. If you plan to add a zipper to the front make sure to cut your vest to the length needed.
Remove the front zipper and front button/snap closure by starting from the bottom and cutting along both sides of the zipper continuing in a straight line to the top also removing the button/snap and the buttonhole
Next, remove the upper section of the jeans where the belt fits including the belt loops using scissors (see pictures above).
Fold over the bottom edge of the jeans ¼” toward the WRONG side, press, fold over another ½” and press. Pin in place and stitch down using a ⅜” seam allowance. Repeat for the remaining raw edges as seen in the picture above.
Cut The Arm Holes
Cut 2 arm holes for the teddy bear on each side of the vest as pictured. I cut just behind the side seam. Hint: Cut smaller arm holes than what you think is needed. You can always cut a larger hole. Test with your teddy bear.
Use a straight stitch to secure the perimeter of the arm hole. Then using the zigzag stitch enclose the raw edge of the arm hole as seen in the pictures above.
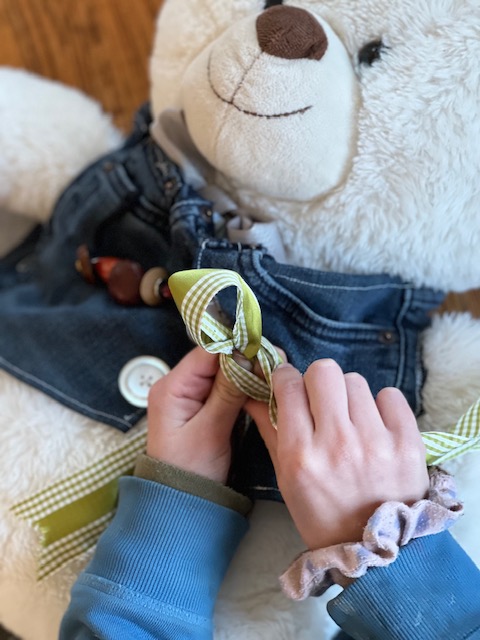
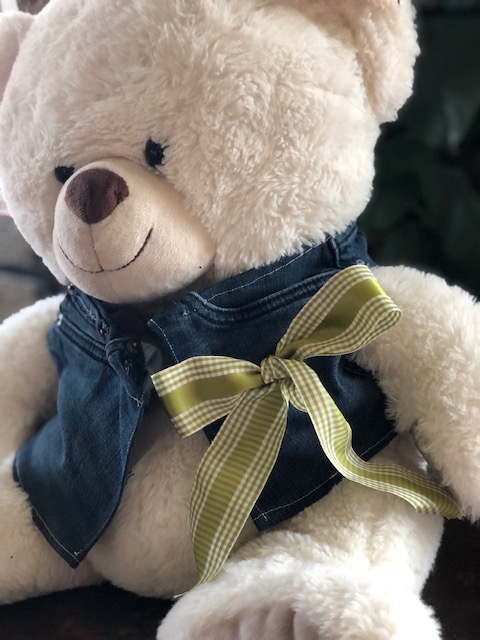
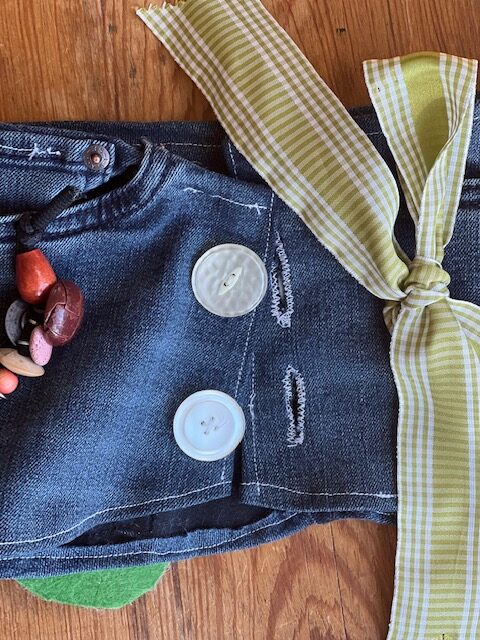
Attach The Ribbon
Fold the ribbon in half. Hand sew or machine sew the middle of the ribbon to the front right pocket making sure not to stitch the pocket closed.
Attach The Shoe Lace
Cut the shoelace to 6” inches long and keep the aglet in place (the hard plastic end that fits through the eyelets on a shoe).
Hand sew the shoelace to the top edge of the front left pocket. I tied a simple knot at one end and sewed it to the top edge of the pocket for additional sewing surface area. Place beads with larger holes or shank style buttons (buttons without holes through the top, but instead have a loop on the back to sew to a garment). All of the buttons and beads I used fit snugly and do not fall off without being pulled.
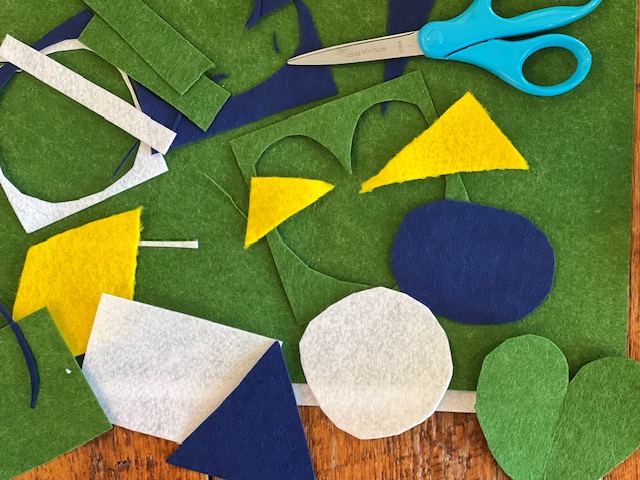
Cut felt shapes. Make a button hole opening based on the size of the button you are using in the middle of each shape.
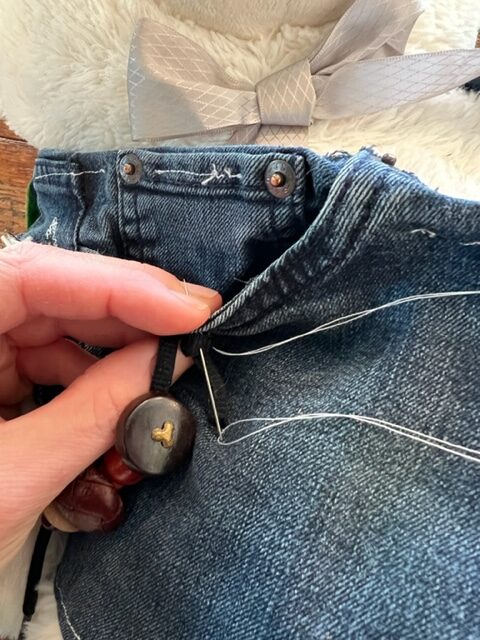
Fold and sew ribbon end.
Sew button on to the sewn ribbon end.
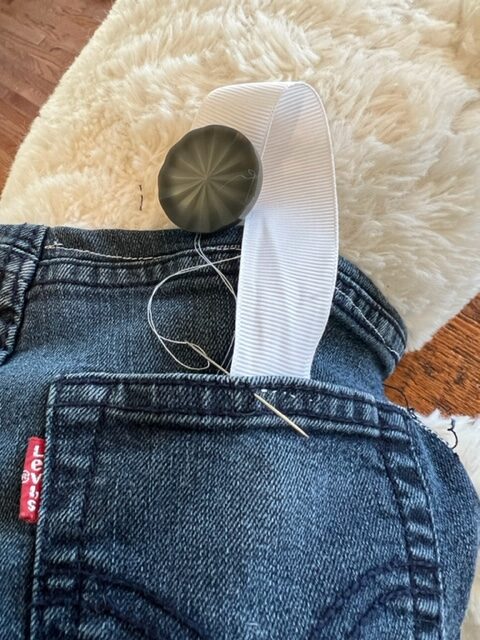
Hand sew the other end of the ribbon to the inside of the back pocket.
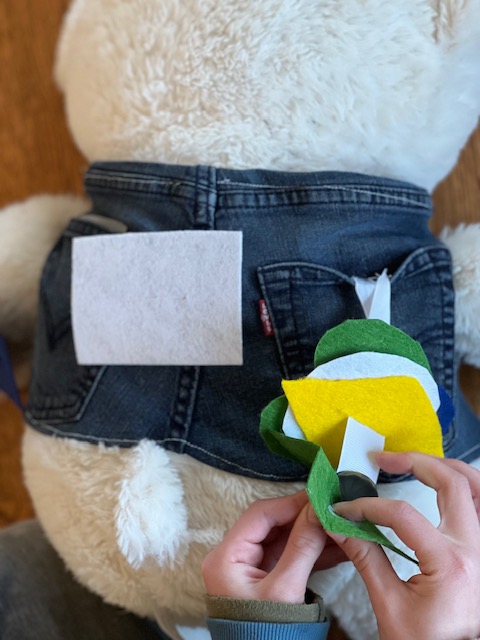
Cut And Make The Felt Shape Stack
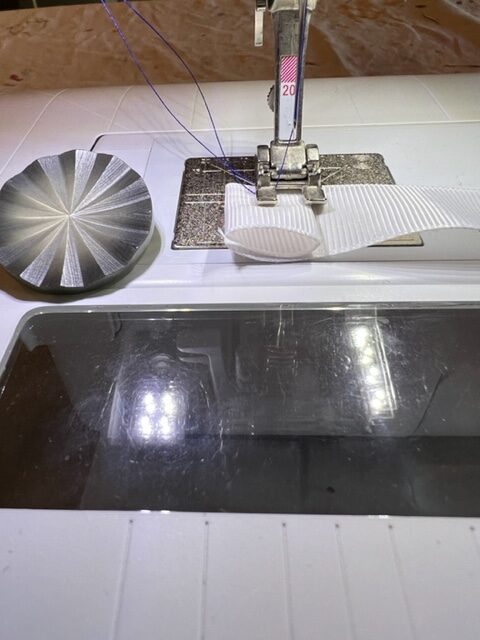
Using the 6” piece of ribbon fold the short edge of the ribbon ¼” (toward to wrong side if available). Fold another 1/2″ and sew securely in place as seen in the sewing machine picture above. I sewed a small box at the end of the ribbon to secure as seen in picture 3 above.
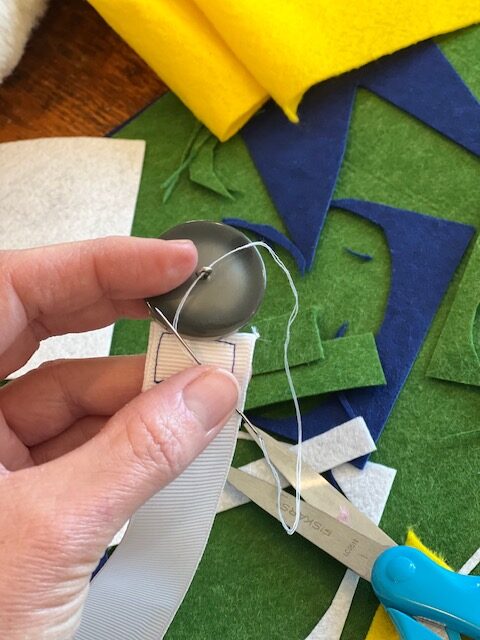
Hand sew a button to the sewn end of the ribbon.
Using the felt squares, cut out small shapes based on the side of the back pocket. Cut the shapes a little smaller than the back pocket size so that they can easily slide inside the pocket.
Cut a buttonhole opening with scissors or an X-Acto knife (place a piece of cardboard under the felt before cutting to protect any surfaces before using an X-Acto knife) in the middle of the felt shape depending on the size button you are using.
Slide the shapes onto the buttoning ribbon and place inside back pocket.
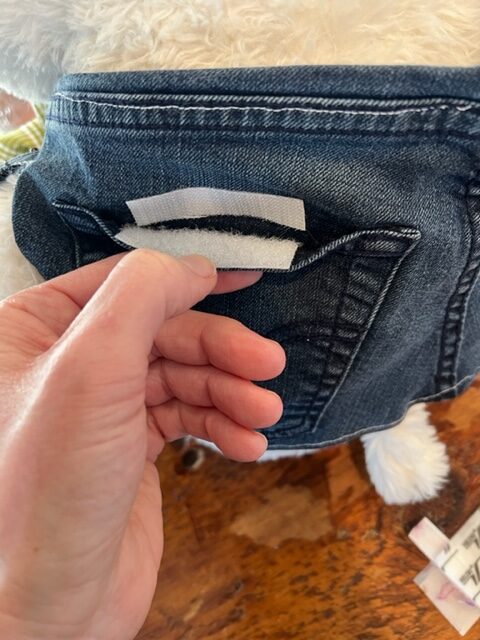
Attach Velcro
Attach Self Adhesive Velcro
Cut both sides of the Velcro to fit on the inside of the opposite back pocket. The Velcro seen in the picture measures 2.5″.
Place Velcro inside the pocket, as seen in the picture above, on both sides of the pocket.
Either use a buttonhole foot or make a slit, straight stitch around the perimeter then zigzag stitch around the hole.
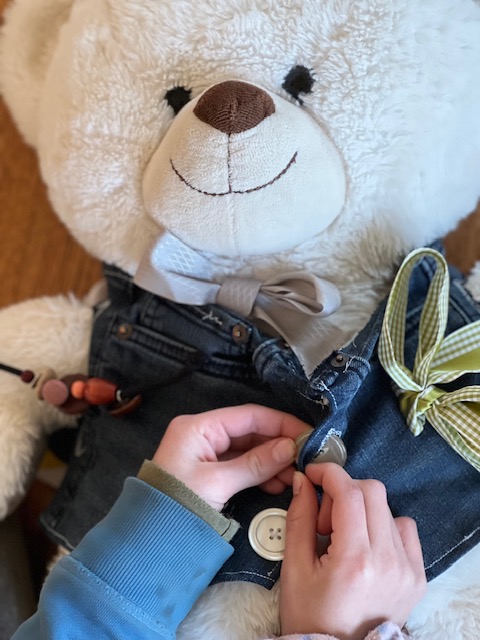
Make Button Holes And Attach Buttons: 2 Ways
Using a Buttonhole Foot: Figure out where you are going to place the buttons and button holes- mark if you choose. Create a buttonhole using the buttonhole foot attachment.
Cut open the button hole using scissors.
Align buttons and hand sew the button on the opposite side of the vest.
Make a buttonhole using scissors, straight stitch and the zigzag stitch: Figure out where you need your button holes and the correct sizing. Make a mark if you like. Carefully make a small slit in the jeans and cut in a straight line the size button hole you need.
Straight stitch, using a sewing machine, around the outside of the buttonhole followed by the zigzag stitch to secure loose ends.
Attach buttons to opposite side of the vest making sure to align your buttons with the buttonholes.