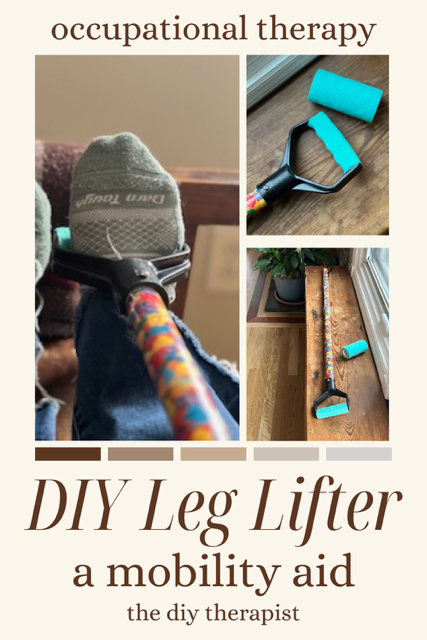
Leg Lifter: An Assistive Daily Living Mobility Aid
A leg lifter is an assistive daily living device that provides support while moving the leg up and down from a raised surface such as a bed or couch. With this device, you will be able to lift your leg onto furniture with ease and less effort. This quick and simple daily living mobility aid can be made quickly with items often found around home. Let’s get started!
This content is not intended as a substitute for medical advice, diagnosis or treatment. Always seek the advice of your physician, therapist, or other medical professional. This content is for informational purposes only.
This post may contain affiliate links. As an affiliate, I may earn a small commission from qualifying purchases at no extra cost to you. Thank you for your support. See our full disclosure.
For today’s project we will be making a version of the leg lifter strap. This type of assistive technology is often recommended in occupational and physical therapy to assist individuals in becoming more independent in their mobility needs. This adaptive aid can be helpful to individuals who are recovering from an injury, surgery such as hip or knee replacement, for those in stroke recovery, or for anyone that has trouble moving their leg from the floor to the bed due to muscle weakness or pain.
What Is A Leg Lifter Strap?
A leg lifter strap is a long, rigid, but also often bendable strap typically 35-42” long that has a large loop at one end to slide the foot through. Additionally, one or more loops at the top are used for easy gripping. Manufactured straps often have a metal rod or sheet sewn into the fabric typically made aluminum or zinc alloy. Some manufactured straps are bendable, making it easy to travel with. 35” straps are often used for shorter adults and children. Typically, a 42” strap is used for average to tall adults.
Using A Leg Lifter Mobility Aid
This daily living aid allows you to easily slip your foot in the bottom loop without bending over, and move or reposition your leg. Those with differences in lower extremity mobility may benefit from the use of aleg lifter to move on/off furniture, the bed, and even the car. Leg lifter straps are often recommended by physical and occupational therapists for patients recovering from surgery, have arthritic pain, lower limb weakness, experience pain during movement, or decreased mobility.
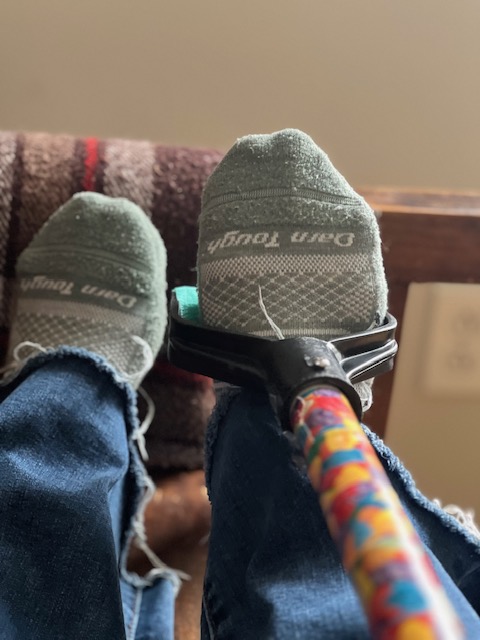
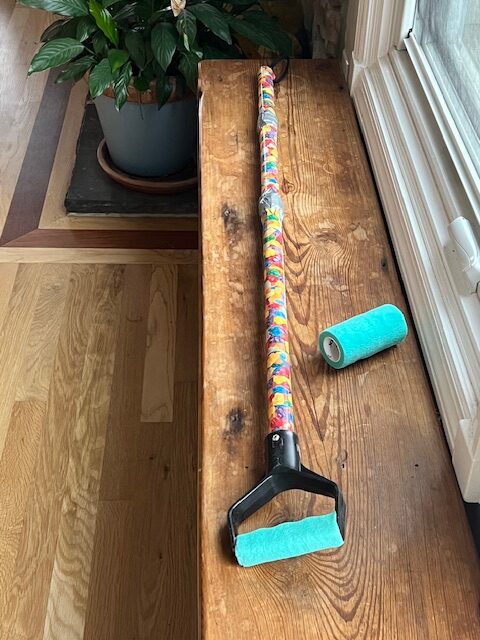
The do-it-yourself version of the leg lift strap featuring a black gardening handle provides support for the foot while repositioning or moving the leg. The turquoise self adhesive bandage provides the foot with a non-slip surface. Wearing non-slip socks are also recommended.
The DIY Version Of The Leg Lifter Strap
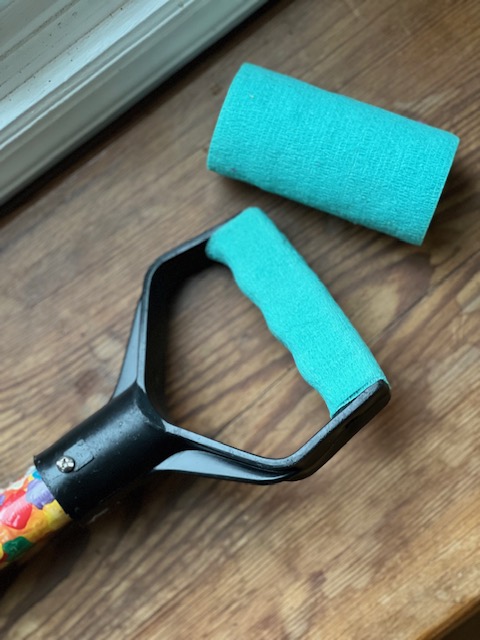
For me, this project was also about repurposing materials. My do-it-yourself version of the leg lifter strap is made with a 41” long and 3/4” wide PVC pipe attached to an old gardening handle to make the foot loop. Cardboard and duct tape built up gripping surfaces were also added to the PVC pipe, although these are optional they are highly recommended. In addition, I wrapped the foot-portion of the handle with SyrFlex, a self-adhesive bandage material, to create a non-slip surface for the foot. A wrist/forearm loop was also added which was repurposed from a recently broken umbrella.
Gardening Handle
All of the materials I used for this project, I already had on hand at my house including the handle which had fallen off of a gardening tool and had not been thrown away. If you are in need of a handle, check with your friends and family first before purchasing. If you are not able to locate one to repurpose, check your local hardware store such as Ace, Lowes, Home Depot, or even order online at Amazon. You may be able to find one used on eBay as well. Before purchasing a handle, make sure to measure or slip the handle over your foot. I was not able to slip my shoe fully into my leg lifter handle (at the arch of the foot); however, if you are able to find a wider handle you may be able to use this device with a shoe on. In addition, make to sure match the shaft of the handle with the PVC pipe size.
Self Adhesive Bandage
Furthermore, I wrapped SyrFlex, also more widely known as Vetrap, around the base of the handle which will help create a non-slip surface for the foot. Vetrap, its common name, is a self adhesive bandage wrap used for bandaging horses and other farm animals. Vetrap is made by 3M and is the same material as Coban. Coban by 3M, is a self adhesive bandage used to wrap limbs of people, is often more expensive than Vetrap. You can find Vetrap or SyrFlex at your local farming or pet supply store such as Tractor Supply. Other varieties of Vetrap are made by various companies under different names such as PetFlex or SyrFlex. Petflex is the cheapest I could find at Chewy’s online, although I have not used this brand personally. No additional tape or glue is needed when using this product.
Leg Lifter Sizing
The length of the leg lifter needed is typically based on the height and individual preference of the person that will be using it. Most leg lifters range in length averaging 39-42 inches. This length generally works well for most adults. A shorter leg lifter may be needed for shorter adults and pediatrics (ie: 34.5 inches) while taller individuals may need a leg lifter that is 42+ inches. But again this can also be based on individual preference as well. Adjustable options are also available. Hand grips or handles/loops are often helpful.
Where and how you will be using the leg lifter can also play a role. For example, if you plan to use it getting into and out of a tall bed, you may need a longer leg lifter. On the other hand, getting into and out of a car or other small spaces, the length may depend on the leverage needed. And if using a wheelchair, it is often based on the angle and leverage needed as well as comfort while using the device; however, the average length of 39-42 inches with a rigid internal rod often works well for adults.
It is always best to discuss with your personal occupational or physical therapist to ensure the correct fit, use, and safety.
Other Options Available Besides A Rigid Leg Lifter?
If you are looking for another option to use besides a rigid leg lifter and are able to bend at the hip, consider using a belt or theraband may be a good fit for you. Using a flexible belt or theraband like strap as your leg lifter will require you to flex or bend at the hip. Make sure before using this type of flexible device that you have been cleared by your therapist or doctor to flex (bend) at the hip post surgery or during injury recovery. Place the strap under the arch of your foot and carefully maneuver your leg. Follow your therapist or doctor’s recommendations.
Who May Benefit From Using A Leg Lifter Strap
Check with your occupational or physical therapist or doctor before using a leg lifter strap to determine if the leg lifter assistive mobility aid is a good fit for you. Use a leg lifter strap only as instructed by your therapist or doctor. Upper body, hand, and core strength are needed when using this type of mobility aid. Often leg lifter straps are recommended when:
Furthermore, a leg lifter strap can provide support for:
Increased mobility and maneuverability
Post-surgical recovery
Help reduce pain while moving the leg on/off surfaces
Gain independence in daily living tasks and mobility
* The leg lifter strap should only be used when moving the leg between surfaces while sitting in a stable and secure position. Do not use on stairs or walk with the leg lifter strap on.
Position your foot in the leg lifter so that it rests in the arch of your foot. Wearing non-slip socks are recommended (which are not pictured here).
How To Use A Leg Lifter Mobility Aid
Make sure you are in a secure and stable position before using the leg lifter mobility device.
Wearing non-slip socks, place the foot handle over your foot making sure the handle is placed over the arch of the foot.
With your wrist/forearm positioned through the hand loop, raise the leg using the built up hand grips. Make sure to use proper body mechanics and techniques as recommended by your therapist based on your condition.
Smoothly and carefully, raise the leg to the desired surface. Do not raise your leg above that which is recommended by your therapist or doctor.
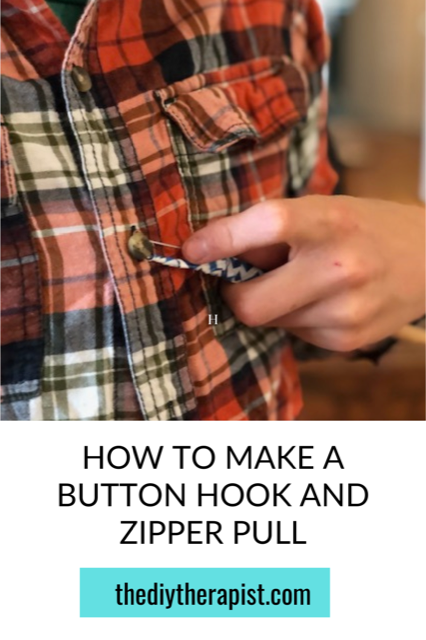
Other DIY Adaptive Equipment You might Be Interested In:
Caution When Using A Leg Lifter Strap
Only use the leg lifter as instructed by your doctor or therapist.
Make sure your DIY leg lifter is made with good construction, is stable, and is a good fit for you to prevent any unnecessary injuries.
When using a leg lifter strap make sure to wear non-slip socks that can grip the strap preventing the foot from slipping out of the leg lifter by mistake causing pain or injury. Non-slip socks can help prevent this. Smooth, flat soled shoes or plain socks or stockings may cause the foot to slip out of the handle by mistake. Do not wear these.
Make sure to position the leg lifter under the arch of your foot to avoid it slipping out easily.
Do not use on wet surfaces.
Avoid lifting the leg too high causing strain to your back and other muscles, and to prevent hip injury after surgery.
Caution when using the leg lifter in a car or other vehicle. Make sure the car is in park, and you are secure and stable before before using it.
Make sure the leg lifter is a good fit and is recommended by your therapist or doctor. It should not cause any pain or discomfort.
Stop using the leg lifter mobility aid if you experience pain or discomfort. Contact your doctor or therapist.
If you have questions regarding whether a leg lifter assistive device is a good fit for you, contact your personal occupational or physical therapist or doctor. It’s important to note that as with any adaptive equipment, leg lifter mobility aids are not a one size fits all solution, but should be monitored by your rehabilitation team.
Important Note On The Leg Lifter Mobility Aid and Physical Rehabilitation
It’s important to note that when using assistive aids, such as a leg lifter or sock aid, the main goal in the rehabilitation process is to become as independent as possible in daily activities after an injury or surgery. In certain circumstances, some individuals will need to continue using the leg lifter depending on their situation, and therapist or doctor recommendations.
However, if you are recovering from an injury and/or surgery, it is important to continue working on your rehabilitation exercises as prescribed by your rehab team with the goal towards independence; therefore, no longer requiring the use of a leg lifter. Continue with your strength and range of motion exercises as recommended by your rehab team. Overall, being independent in mobility is the ultimate goal, not continuing using the leg lifter when it’s no longer needed. Discontinue use when recommended by your personal therapist or doctor.
How To Make A Leg Lifter Strap
Materials
A 3/4” wide PVC pipe or strong wooden dowel rod (base this on the size needed your handle size) cut to 35-42” (35” for shorter adults and children, and 42” for average to taller height individuals.
Hacksaw to cut the PVC pipe to desired length
Drill with bit with appropriate size for bolt
One approximate 1 1/4″ dulled-ended machine screw with matching nut
One approximate 1/2″ dulled-ended machine screw with matching nut
Sturdy D-grip handle (new or used). Make sure to test handle size with your foot to ensure its a good fit.
Duct tape
(optional) 2-3 cardboard strips, approximately 4×1″ for making built up grips
Screwdriver
Wrench
Scissors
(Optional) Strong wrist strap loop (I cut the nylon strap that was attached to an umbrella and singed the ends using a match. Look around your home for something strong and sturdy to use for this purpose. Make sure the user can easily slip their wrist through).
One sharp ended screw or other pointed object to puncture a hole through the wrist strap if needed.
(Optional) One match or lighter, or sewing machine or needle depending on the material type you are using for your wrist/forearm loop to secure loose ends.
(Optional) needle nose pliers for tightening the short screw
(Optional) decorative duct tape for wrapping the PVC pipe (use a contrasting color for vision impairments)
Drill a hole through the designated holes on the handle through the PVC pipe and secure the 1 1/4" screw and nut.
Cover the end of the screw with duct tape, if needed, to prevent scratches.
Make built up handles based on the users positioning preference by using cardboard and duct tape.
Secure the built up gripping surface with additional duct tape. Add 2-3 built up gripping surfaces per user's preference.
Using a sharp-ended screw or other pointy object, carefully create a hole in your strap for 1/2" dull-ended screw to easily go through.
Add a wrist/forearm loop by securing it with a short screw and nut. If needed sew or singe any loose ends of the forearm loop depending on your material type before attaching it to the PVC pipe. Wrap the top end of the PVC pipe with duct tape to prevent scratches.
Wrap the foot handle with self adhesive bandage to create a non-slip surface for the foot. Optional, wrap the exposed white PVC pipe with decorative duct tape. Leave the built up gripping sufaces visible for those with vision impairments.
And you're done!
Instructions
* As always adhere to safety precautions when using power tools such as the drill. Also use caution when using the hacksaw and matches/lighter to prevent any injuries. If you are new to using a power tools or a hacksaw, please ask a friend or family member for help.
With caution, cut the PVC pipe to size using the hacksaw. See note above under the materials section.
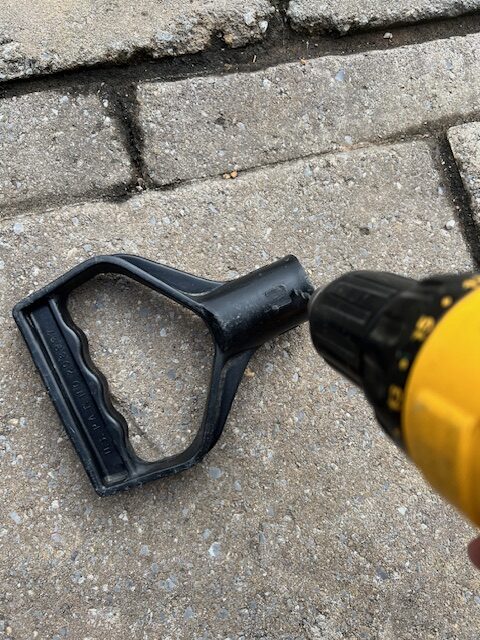
Carefully, drill one hole in each side of the handle as seen in the picture.
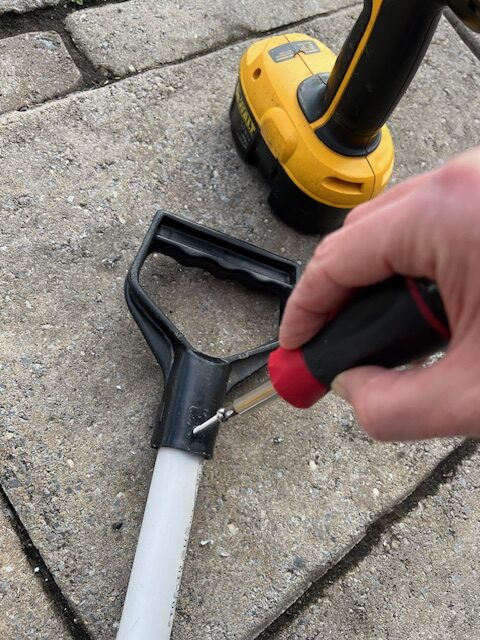
Next, place the PVC pipe inside the handle and drill a hole through both sides of the PVC pipe using the already predetermined drilled holes on the handles as a guide. Once you have drilled a hole through one side, make sure to keep holes aligned before drilling the second side.
Place the 1 1/4″ machine screw through the holes, add the nut and tighten using the screwdriver and wrench.
Cover the nut end with duct tape to prevent any scratches.
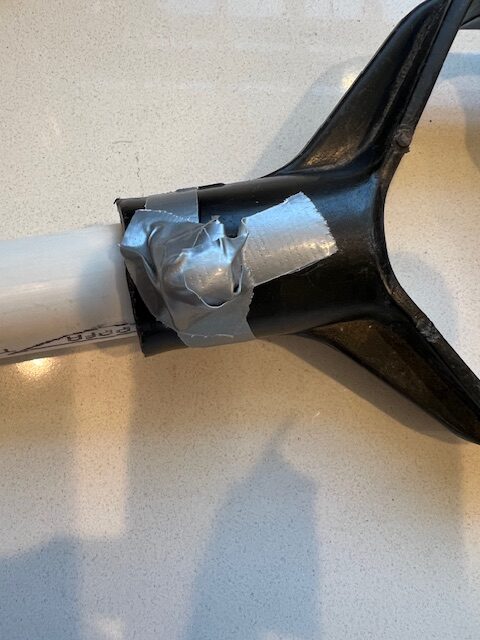
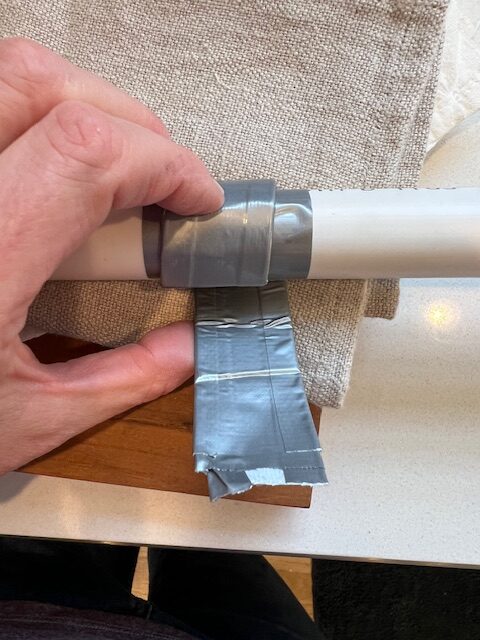
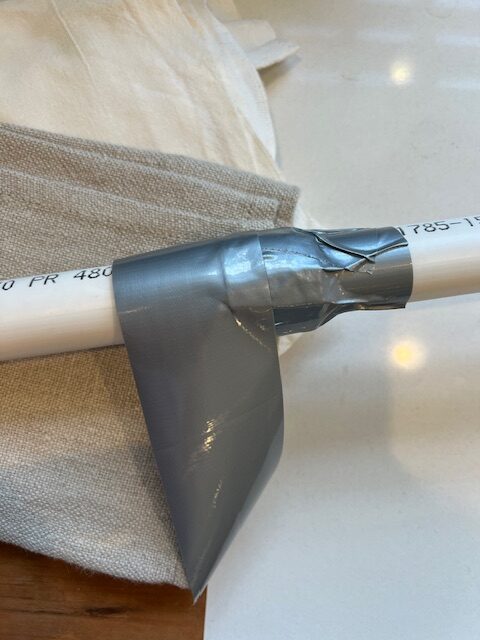
(Optional, though recommended) Add a built up gripping surface, approximate where the raised gripping surface should be based on the individual’s preferences. Wrap a 4×1” cardboard strip with duct tape as seen in picture. Secure one end with a piece of duct tape where you would like to built up gripping surface to be. Wrap the remaining cardboard piece around the PVC pipe and secure it with duct tape. Add additional duct tape to secure both sides. Add 1 or 2 additional raised gripping surfaces if needed.
To make the wrist/forearm strap, depending on your material type, singe or sew the strap to prevent fraying using a match, lighter, or sewing machine/sewing needle. If singeing, carefully move the match or lighter slowly back and forth over the cut end- you will see the nylon ends “melt” securing the ends. This takes a very short about of time- no more than 5 or 10 seconds. Make sure to extinguish in lit matches. If you prefer, you can also sew any loose ends.
Attach the hand loop- Using the drill, drill another hole in the opposite end of the PVC pipe for the smaller 1/2″ long bolt. Make sure the hand strap is the correct placement as preferred by the user.
Using a screw or other pointed object, create a hole through both ends of the strap for the bolt to go through (see picture). Place the bolt through both ends of the strap, and push the bolt through the PVC pipe hole, and secure with a nut using your fingers or needle nose pliers.
Wrap the open top end of the PVC pipe with small strips of duct tape (as seen in picture).
Wrap the portion of the handle where the foot will be resting with Coban, Vetrap, SyrFlex, or Petflex. Squeeze around all sides to secure the self-adhesive bandage..
(Optional) Wrap the exposed white parts of the PVC pipe with decorative duct leaving the handles a contrasting color for those with visual impairments.