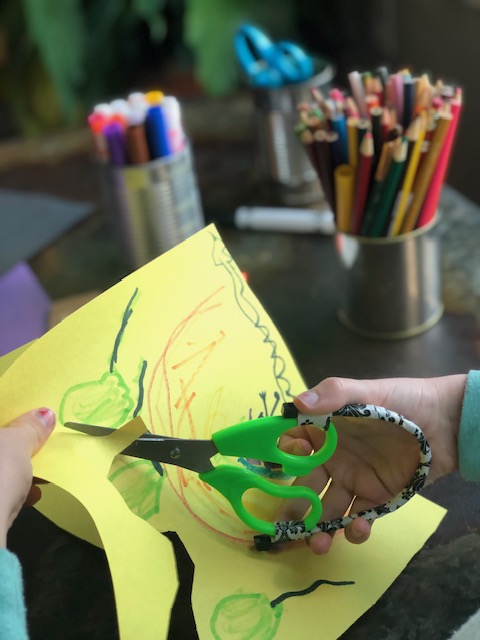
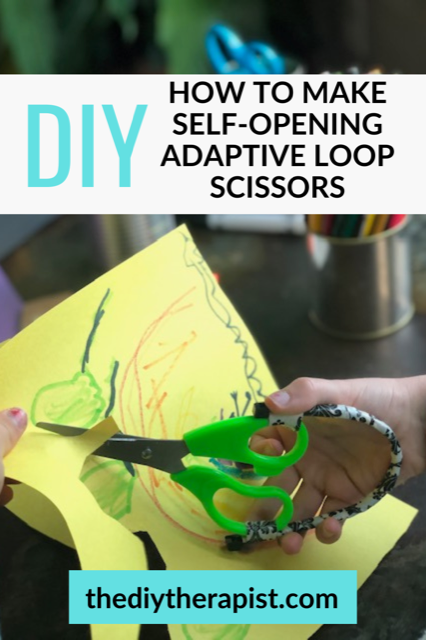
With just 4 household items, these do-it-yourself loop scissors can be made and ready to use at home and school in no time. Adaptive scissors make learning to scissor fun. The automatic self-opening blades make scissoring easier for individuals who have hand weakness and motor planning differences. Let’s get started!
This content is not intended as a substitute for medical advice, diagnosis, or treatment. Always seek the advice of your physician, therapist, or other medical professional regarding a medical condition or treatment. This content is for informational purposes only.
This post may contain affiliate links. As an affiliate, I may earn a small commission at no extra cost to you on qualifying purchases. Thank you for your support. See our full disclosure.
Loop scissors are a type of adaptive scissors specifically made for children who have difficulty opening traditional scissors while cutting. This adaptive school-based scissoring aid are often recommended by occupational therapists. The self-opening blades help individuals with fine motor differences and motor planning difficulties open scissors with ease. The loop scissors purchased online do not have finger placement holes but instead feature a plastic loop connecting the two sides. These handy little scissors are spring loaded allowing the scissors to open automatically after cutting.
On the other hand, the DIY loop scissors are made using two zip ties, and is not spring loaded. However, the zip ties act similar to the spring loaded scissors in that they, as well, open automatically. These adaptive scissors can be made using either child safe scissors or full sized scissors for adults.
Why Can Cutting With Scissors Be Difficult?
First off, cutting with scissors is a complex task. Scissoring involves:
Fine motor skills- the coordination of the small muscles in the hand during manipulative hand movements needed for activities such as picking up coins or small beads, playing Lite Brite, or sewing by hand.
Separation of the hand- is the ability of one side of the hand to separate from the other side of the hand during an activity. Both handwriting and scissoring use the fine motor skill of separation of the hand meaning the thumb, index and middle fingers are moving differently, though coordinated, with the pinky and ring fingers to complete the task.
Fine motor strength- is the ability to control the small muscle movements of the hands and fingers to a complete task such as peeling an orange.
Bilateral coordination- is the ability to use both sides of the body during an activity such as when buttoning, handwriting, and shoe tying.
Furthermore, when breaking down the task of using scissors, scissoring is a complex task. It requires not only the fine motor skills to open and close the scissors (hand separation), but also coordination with the eyes (visual motor) and also manipulating, or turning of, the paper with the opposite hand (bilateral coordination) at the same time. There’s a lot that goes into this important skill.
Fine Motor Activities To Support Scissoring
Fine motor strength and coordination skills are so important as a child is growing and learning to do new things like scissoring, holding a pencil, or buttoning a shirt. Here is a list activities to support the development of fine motor skills, coordination, and strength.
Create animals and other figures with modeling clay or play dough. Then, to start over, cut the dough or modeling clay with play dough scissors or child safety scissors.
Build a 3-D structure or a 2-D picture on a table top using blunt toothpicks and marshmallows (or even small balls of playdoh).
Participate in finger games such as the Itsy Bitsy Spider and finger puppets. Such games can be played while driving in the car.
Practice manipulating clothing fasteners such as buttons, zippers, and opening and closing snaps. Check out this diy teddy bear dressing vest.
Play the games that encourage the use of fine motor skills such as Bed Bugs, Lite Brite, and Checkers.
Manipulate coins from the palm of the hand to the finger tips.
Safe food prep activities, that are age appropriate, such as snapping peas, peeling potatoes, mixing a bowl of dough, or shaping cookies.
Upper Body And Fine Motor Resources You Might Be Interested In:
Why Make Loop Scissors?
Have I mentioned that loop scissors are pretty fabulous? Okay, I might not have, but as an Occupational Therapist, I think loop scissors are really pretty awesome. Let me tell you why.
Loop scissors are great for not only children, but can also be useful for adults as well who have difficulty opening scissors . These adaptive scissors are great for learning to use scissors, cause less strain and fatigue on the hand, and are great for children and adults who may experience any of the following:
Difficulties with motor planning or dyspraxia
Fine motor skill impairment
Muscle tone differences
Arthritis
Injury to the dominant hand
Difficulties with separation of the hand
Important Notes About Loop Scissors
Loop Scissors purchased online have a small, gentle spring to help the scissors open easily, however, the blades do tend to besharp. Loop scissors take away the action needed of opening the scissors; therefore, allowing cutting with scissors easier.
Self-Opening Scissors and Blade Cover
The do-it-yourself loop scissors, instructions below, contain no spring, but with the help of zip ties, these handmade loop scissors automatically spring open – similar to the original. I recommend using child safety scissors so the blades will not be too sharp for those using them. The instructions below also include how to make a protective blade cover because even at rest these scissors will remain open even when not in use.
DIY Loop Scissors and the Zip Tie
It should be noted, one thing I like about these do-it-yourself loop scissors are the knobs (also known as cable tie head) on the zip ties. The placement of the knobs helps to keep the fingers stay in place and are, therefore, easier to grip- without slipping. I highly recommended trying out the loop scissors with the knobs first. The knobs can always be taken off later by removing the duct tape and going back to step 1 in the instructions.
Safety Precautions
Most importantly, as with any scissors, always adhere to safety precautions. It’s a great idea to start this project first with making the blade cover. Placing the blade cover over the blades before starting to work on the rest of the loop scissors ensures safety. Tape the blade cover in place if needed while working. Always ask for assistance if needed when making the DIY loop scissors. Only adults should make the loop scissors.
How To Make Loop Scissors
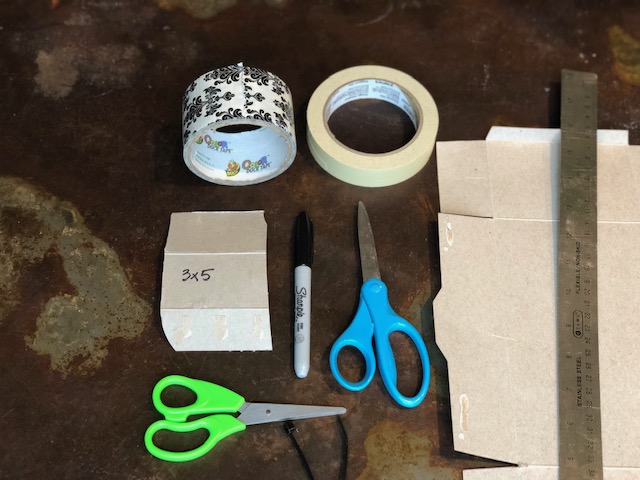
Materials
1 pair of 5” child safety scissors
2 zip ties found at your local hardware store
Masking tape or duct tape (I used decorative duct tape for a super cute pair of loop scissors)
3×5″ piece of thin cardboard (such as a cereal or cracker box) used as a blade cover/protector (size may vary depending on scissor blade length. See below.
Instructions
Make a simple blade cover using upcycled cardboard and tape using either duct tape or masking tape.
Blade Cover Instructions
For the Blade Cover: *Measurements may differ depending on the size of scissors*
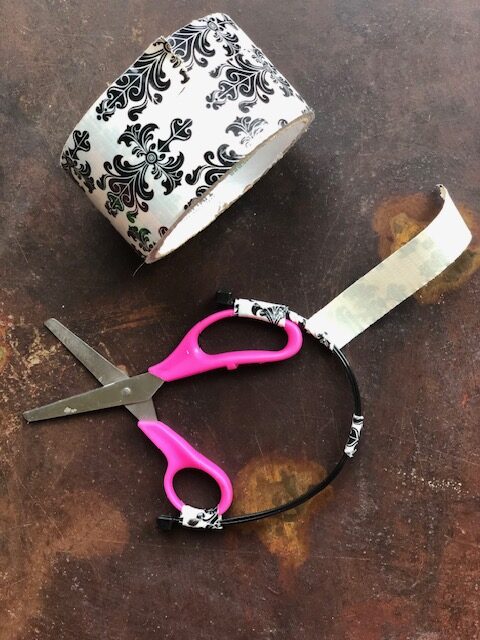
First cut a 3×5″ piece of thin cardboard for the blade cover. This measurement may differ depending on the size of loop scissors you are making. My scissors are 5” tall from the end of the blade to the end of the finger holes.
Next, fold the piece of cardboard into thirds so that it fits snugly around the opened scissor blades and secure with a small piece of duct tape.
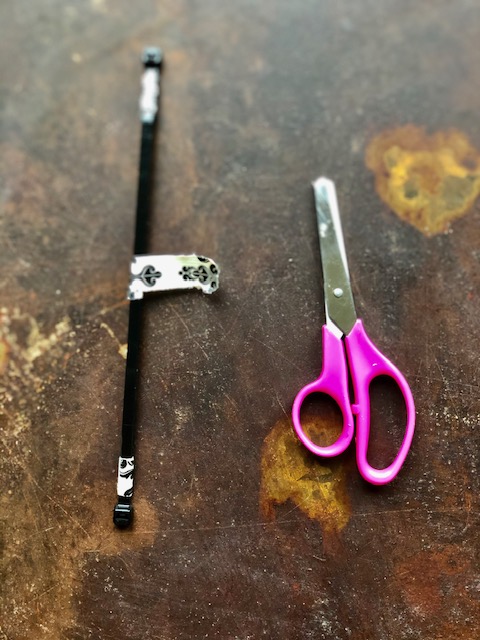
Secure the two zip ties together using small strips of duct tape.
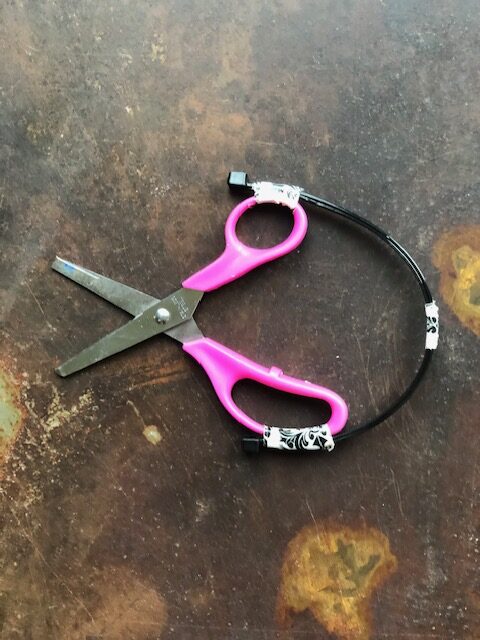
Attach one end of the zip tie to one of the finger placement loops. Make sure to secure it to the upper side of the finger loop where thumb or fingers can be placed without slipping.
Attach the other side of the zip tie to the second finger placement loop on the scissors creating a nice loop in the zip tie. Make sure the knob is located on the upper side of the scissors. Test finger placement before securing further.
Once the zip tie placement has been tested by the user, wrap small strips of duct tape covering the zip tie.
Loop Scissors Instructions
For the Loop Scissors:
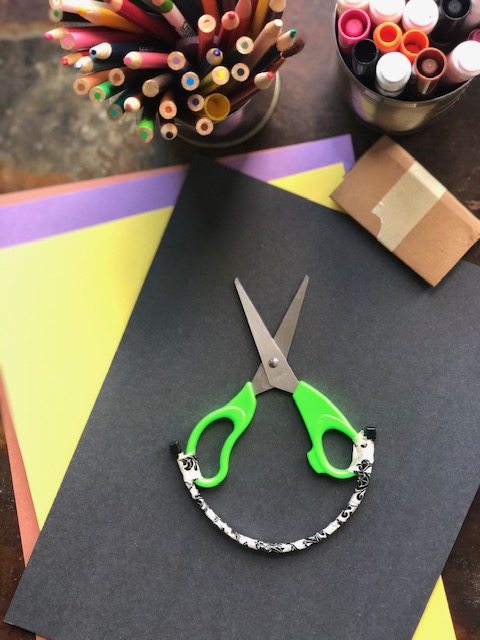
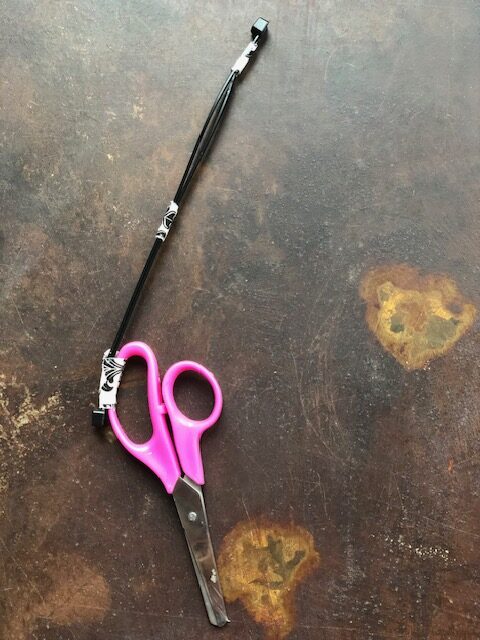
1- First, place the two zip ties one on top of the other making sure the knob/fasteners are at opposite ends, and the pointed end does not overlap the fastener.
2- Lastly, secure zip ties in place using either small pieces of masking tape or duct tape (one piece on each end and a third in the middle making sure there are no gaps between the zip ties). Use decorative duct tape for a super cute pair of loop scissors.
3- Next, tape each zip tie end with a thin piece of tape to the upper rounded edge of the finger holes. Place thin a piece of duct tape to secure placement, and wrap several times. Check the knob-finger placement on the child before securing with additional tape.
In conclusion, loop scissors are pretty awesome right? I can’t wait to hear how this project goes. How did you like the knobs on the loop scissors? Did the knobs help with keeping the fingers in place? Let me know in the comments below.
2 thoughts on “Self-Opening Adaptive Loop Scissors”
Nurse Nate
I’m going to try this for my patient with incomplete quadriplegia. I’m teaching him how to do things but he struggles with the hand dexterity and finger strength to tear open packages. Adaptive devices are very expensive so hopefully this will be the answer! Thank you!


I’m going to try this for my patient with incomplete quadriplegia. I’m teaching him how to do things but he struggles with the hand dexterity and finger strength to tear open packages. Adaptive devices are very expensive so hopefully this will be the answer! Thank you!
Hi Nate,
Thank you for your message and reaching out. I hope these adaptive scissors work well for him.