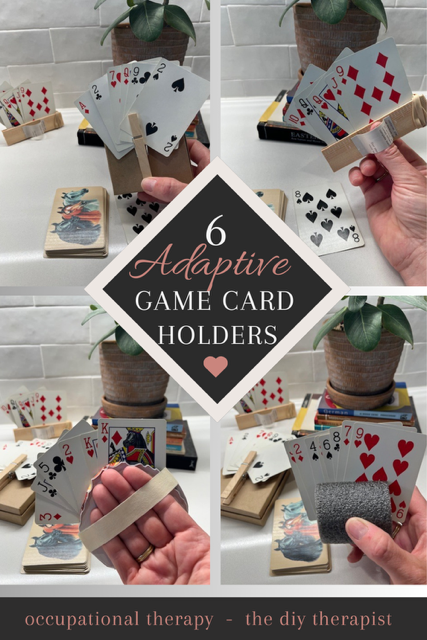
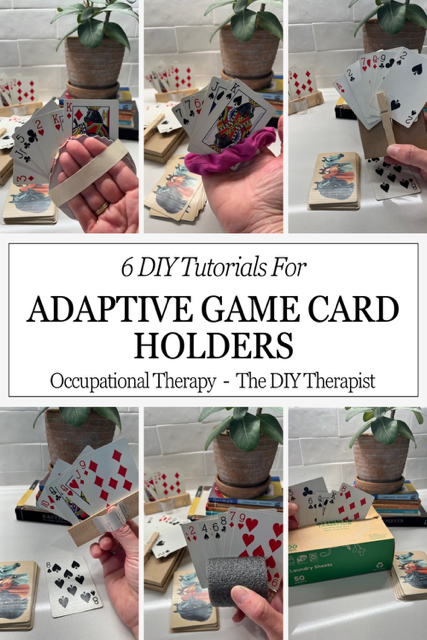
Today’s resource is all about how to make your own adaptive game card holders. Adaptive game card holders can provide assistance to individuals who have difficulties holding and/or maintaining their grasp on a fan of playing cards. This do-it-yourself tutorial includes 6 types of adaptive game card holders so that you can pick the one that best fit your needs.
This content is not intended as a substitute for medical advice, diagnosis, or treatment. Always seek the advice of your physician, therapist or other medical professional regarding a medical condition or treatment. This content is for informational purposes only.
This post may contain affiliate links. As an affiliate, I may earn a small commission at no extra cost to you. Thank you for your support. See our full disclosure.
We played a lot of card games going up. In my younger years, it was Go Fish, then Rummy and Spades. My sister and I, and parents as well, would play rummy for hours, keeping score. My Mom was known for holding out, keeping her matches safe in her hand until the end. She would place them on the table all at once, going out, and winning the game in an instant. It was hard to beat my Mom at Rummy.
During our summer and winter school holidays, we would visit my cousins often playing cards into the wee hours of the night. Spades was often the game of choice, snacking, laughing, and just being together. Playing cards with my family and cousins always brings back sweet memories of my younger years growing up and playing lots and lots of card games.
Today’s project is all about hand-creating a playing card holder that fits your needs so that you or your loved one can more easily participate in a beloved card game with the support of this adaptive aid.
What Are Adaptive Game Card Holders?
An adaptive game card holder is an assistive device that makes holding and manipulating the playing cards in your hand easier. These adaptive game cardholders also include various features such as built up gripping surfaces, minimal finger movement to grasp or release cards, a handsfree card holder that rests on the tabletop, or aids that feature universal cuffs which require no holding the of the cards in hand.
What Are The Benefits Of Using An Adaptive Game Card Holder?
Individuals who have differences in their hand strength, dexterity, fine motor control, and/or experience hand pain due to an injury or arthritis, these adaptive game card holders may be a good fit for you. If you enjoy playing cards with family and friends or would like to start as a new player for the first time, these adaptive devices may provide you with the “just right” support that you need to play a card game such as Uno, Hearts, Rummy, Spades, Crazy Eights, or Go Fish.
Looking For The Ready-Made Version?
The Wright Stuff, a physical therapist owned online retailer, offers a hands-free game card holder that works well for those who have difficulty maintaining their grasp on cards. Click the button below for more details.
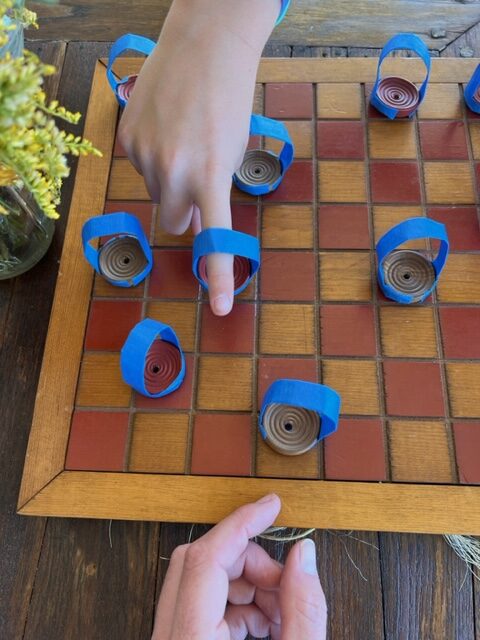
Looking for additional adaptive games? Check out these adaptive game pieces using checkers.
The 6 Adaptive Game Card Holders
Today’s project includes 6 simple, but effective do-it-yourself playing card holders. Below each DIY adaptive card holder has it own features listed including the benefits it can provide the user, any known limitations of the card holder, materials needed, and instructions for making your own. Make sure to check out each card holder version before you start creating to decide which will best fit your needs.
Some of the handmade playing card holders are similar in their features (ie: built up gripping surface) but require different materials to create. I thought this would be helpful so that you can make one based on your needs as well as the materials you, hopefully, already have at home.
Watch The Video Tutorial Here:
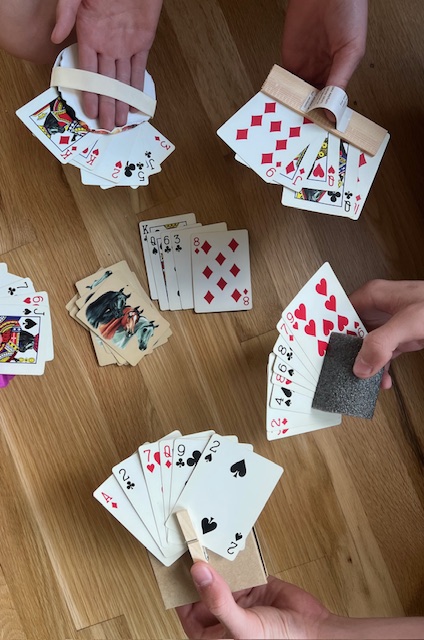
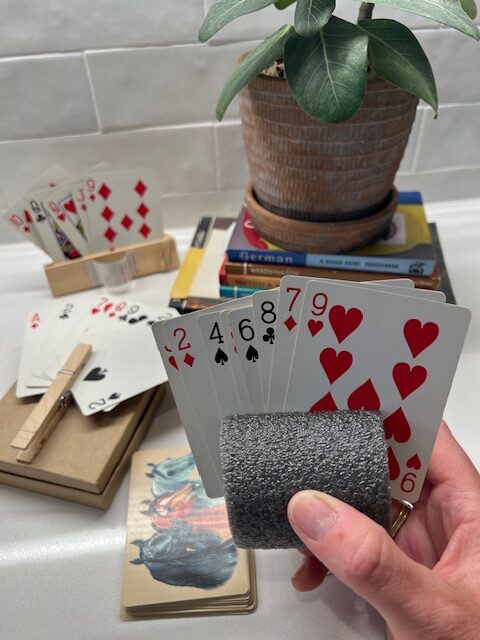
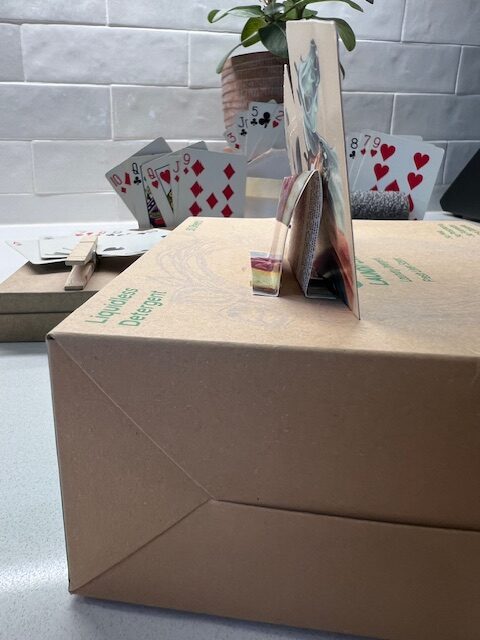
A built up playing card holder using a pool noodle or shipping device (featured is a shipping and packaging device that I specifically saved for projects like this).
#1: The Pool Noodle Adaptive Game Card Holder
Features:
Quick and easy to make
Built up gripping surface for better comfort and less stress on the joints.
Great for those with arthritis, during stroke recovery, hand weakness, or post hand injuries
For those with a closed hand position, the pool noodle will provide a nice stretch while playing cards.
This device cannot be used handsfree sitting on a tabletop unsupported as it will roll. However, it can be propped up from behind and will stay up right while you relax your hand. I used a large binder clip to prop up mine from behind and it worked great.
Materials:
Pool noodle or something similar used as a packing/shipping device as pictured above.
Box cutter or other sharp knife
Instructions:
Using a box cutter, carefully cut a pool noodle to an approximate 2.5 inch width, or that based on the width of your hand or a child’s so that it rests in a comfortable position.
Place the cards in the already open slit, and hold in a palm up position.
A DIY card holder using a scrunchie as a universal cuff to hold the cards.
#2: The Scrunchie Universal Cuff Adaptive Game Card Holder
Features:
No set up or DIY required, just a scrunchie over the fingers.
Maintaining a grip on the cards in not required with this version.
Some adjusting of the scrunchie may be required when placing cards inside the scrunchie.
Cards can be positioned on the back or the side of the hand as well.
Fine motor control, strength, and dexterity is not required to keep the cards positioned on the hand.
This device is great for those with hand weakness, has arthritis, recovering from a stroke, experiences hand pain, or post injury.
Materials:
Scrunchie that fits around the hand snuggly, but isn’t too tight. The material of the scrunchie should be tolerated by the user- comfortable and soft, avoiding itchy fabrics. Depending on the width of the hand, a ponytail may also be used, ensure it’s not too tight.
Instructions:
Place a scrunchie around your fingers close to the knuckle area as pictured above.
Insert playing cards either against the palm of the hand, side, or back side of the hand based on the user’s preference and needs.
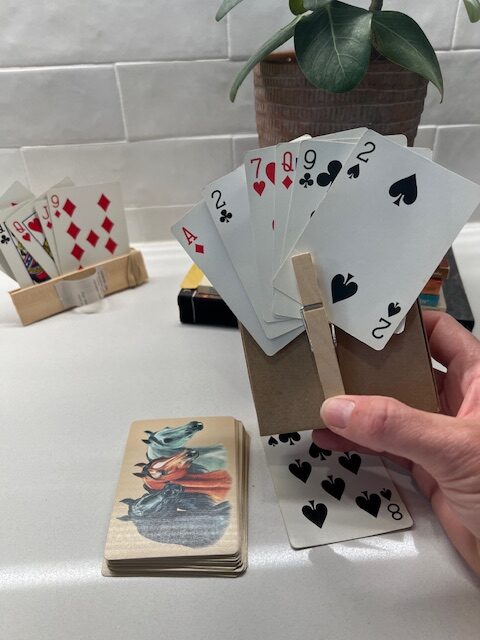
DIY built up game card holder using a jewelry box and a clothes pin. Small movements of the thumb are needed to use this adaptive aid.
Minimal active thumb movement (flexion) required to move cards in and out of the clothes pin.
The jewelry box may also be flipped over or positioned so that one of the fingers releases the clothes pin when needed.
Great for those with limited finger or thumb movement, recovering from a stroke, hand injuries, arthritis, and hand weakness.
Materials:
Medium sized jewelry box of choice (including lid)
Clothes pin
Super glue or other adhesive
Instructions:
Place super glue on one side of the clothes pin, and stick it to either the backside or the frontside of the jewelry box. Let dry completely.
Tape box closed if desired.
Place cards inside the clip and position as needed.
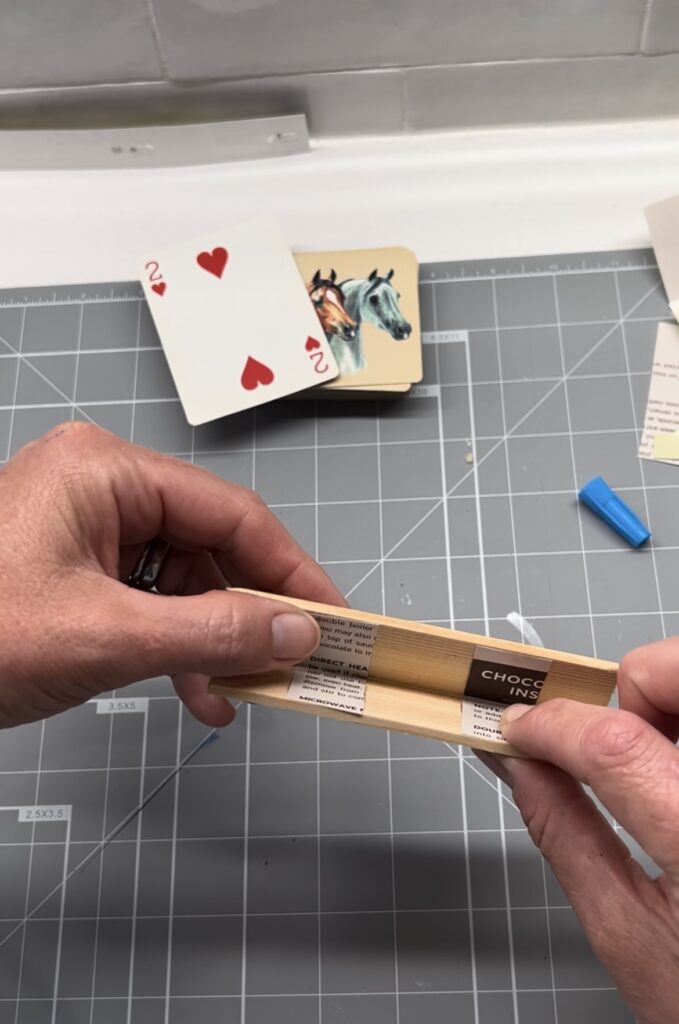
Glue thin cardboard to the inside of both paint sticks connecting the insides.
Attach the thumb and finger placements using glue. If cards slip out the side, wrap a rubber band around one or both ends.
Completed game card holder using a paint stick, thin upcycled cardboard, glue and a rubber band- though the rubber band is optional.
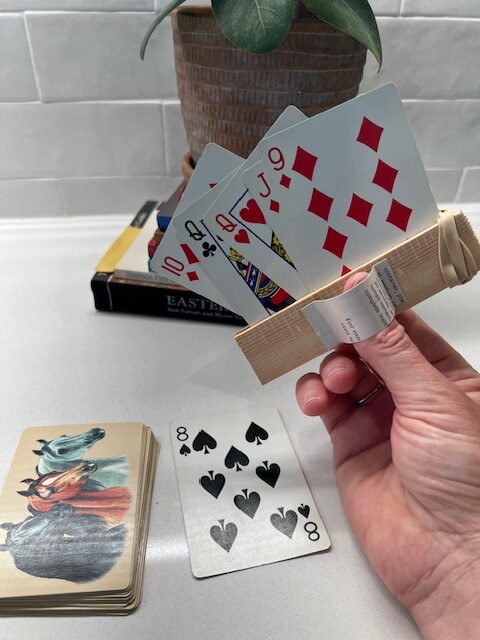
#4: The Paint Stick Game Adaptive Card Holder
Features:
Two finger gripping required with finger placement.
Adjust the finger placements as needed based on the angles of fingers needed.
Add additional finger placements as needed.
Wider gripping surface.
A palm up, supine hand position is needed to keep the cards from falling out of the holder.
Easily rests at the fingertips.
Great for those with minimal active finger and thumb movement, stroke recovery, and hand weakness
Various fingers can be used in the finger placement straps. Using the index finger is not required.
Minimal finger movement is needed to open and close the game card aid
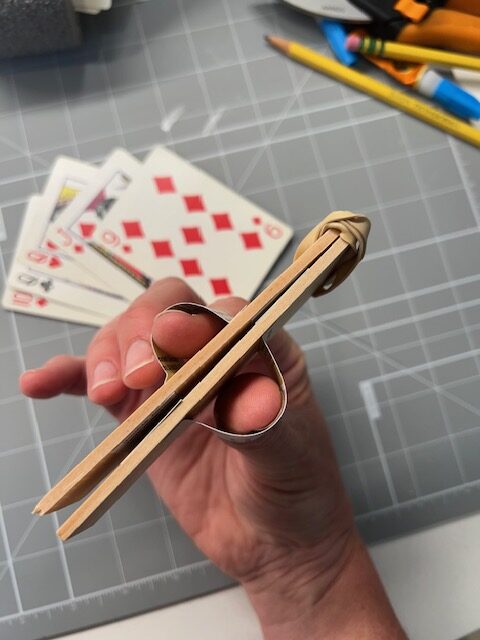
Optionally, wrap a loose rubber band around the device (as seen in picture above) on one or both sides to keep it closed, if needed based on your situation.
Materials:
1 paint stick stir
Thin cardboard packaging such as from a cereal box
Scissors
Super glue or other adhesive
Pruning shears, box cutter, or hacksaw
Sand paper, optional
1-2 Rubber bands, optional
Instructions:
Cut the paint stick, carefully, to 4.5 inches long using a hacksaw, box cutter or pruning shears. Cut two pieces.
Cut two card board strips approximately 1 x 1.5”.
Next, glue half of each side of the cardboard to the inside of each paint stick, as pictured, using super glue.
Based on the width of the fingers that will be used for this device, cut finger placement loops, making sure to add at least ½” extra for gluing to the paint stick.
Fold approximately ¼” at each end of the cardboard finger loops. Make sure the finger placement loops are a good fit by placing them on the paint stick with the user’s finger inside before gluing.
When ready, glue finger placements in place based on your needs. Add additional finger placements if needed.
Sand the ends with sand paper if you choose.
Optionally, wrap a rubber band over the ends of both paint sticks to keep closed while playing.
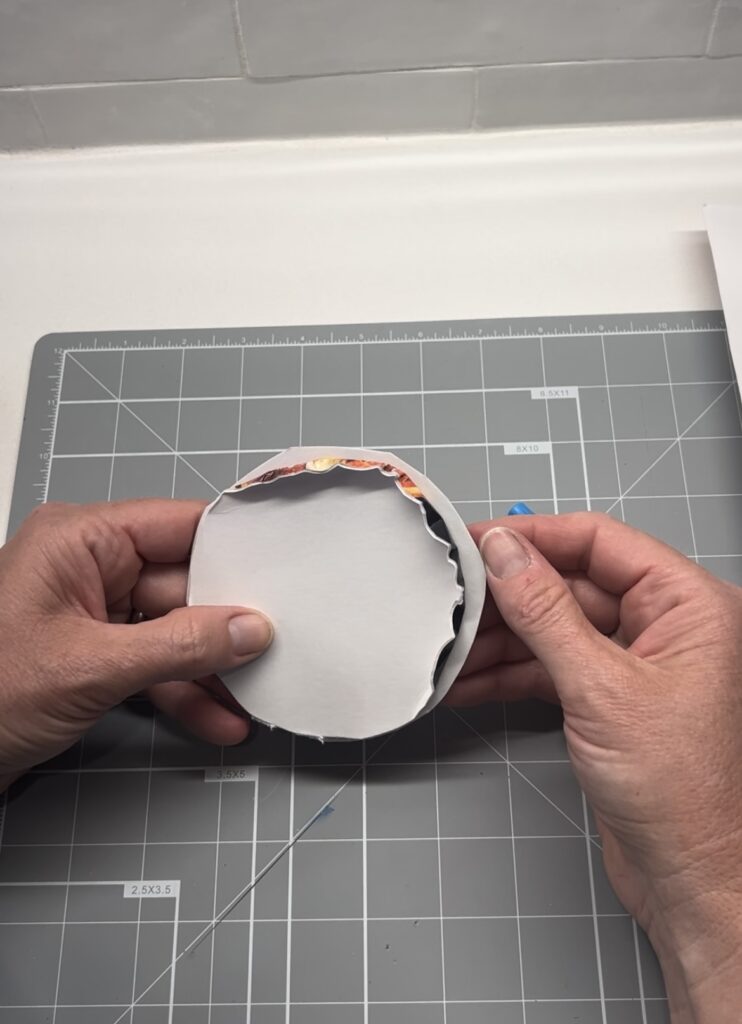
Glue each of the three squares, one on top of the other, then glue to the bottom edge of one circle. Next glue the other circle attaching it to the square. Do not glue the entire circle together.
Next, curl or fold the top and side edges of one circle. Do not fold under the other circle.
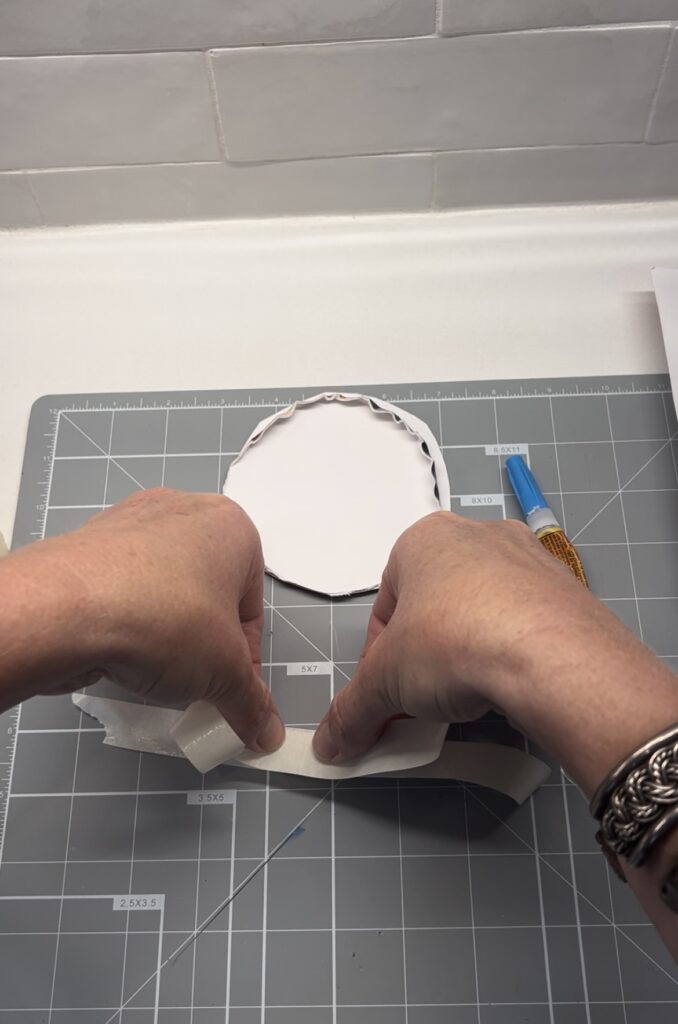
Make the universal cuff using duct tape or masking tape strips laying one strip on top of the other if using masking tape. See duct tape directions below.
Secure the universal cuff to the back of the circles using additional tape. Make sure to get the right fit before taping so that the fingers can easily slip in and out of the card holder.
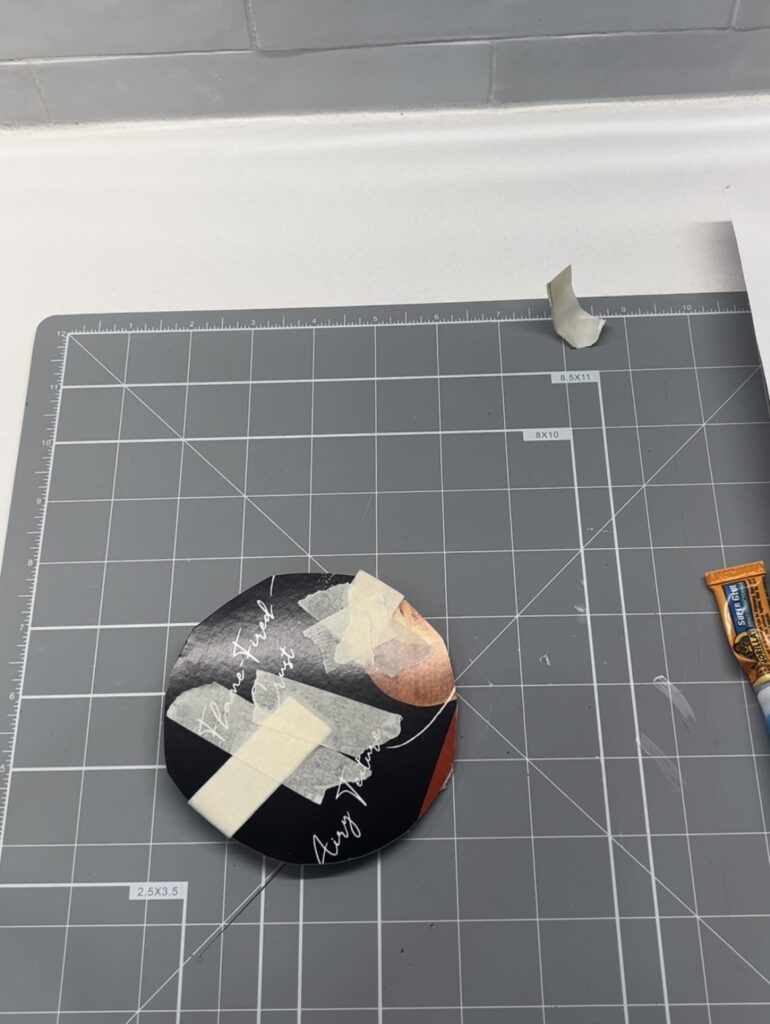
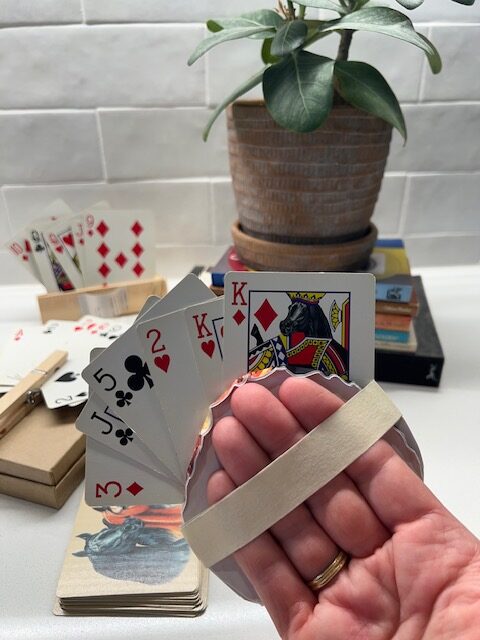
A completed universal cuff game card holder featuring two pieces of cardboard glued together maintaining the game cards' position.
Easily slip the cards inside the holder due to the curled edge.
The universal cuff game card holder is reversable based on your needs or preferences. Meaning, the curled edge can be positioned with palm side of the fingers lying against the cardboard. Or it can be reversed with the fingernails against the cardboard.
An upright hand position will be needed to maintain the cards’ position.
Great to use during stroke recovery, those with arthritis, post injury, hand weakness, or fine motor differences.
Materials:
Masking tape or duct tape (use duct tape if you need a stronger and more durable universal cuff).
Thin cardboard repurposed from food packages (2 medium sized circles similar to that pictured above, and (3)- 1″ squares). Sturdier cardboard can also be used if needed.
Scissors
Pen or pencil to draw 2 sized circles
Super glue or some other adhesive
Instructions:
Cut two medium sized circle approximately 3.5-4 inches wide (masking tape works great to trace). Adjust sizing based on your needs and approximate finger width across all 4 fingers.
Cut three 3/4 inch thin cardboard squares.
Next, glue the three thin card board squares together, one on top of the other. Let dry.
Glue the stack of cardboard squares to the middle of the bottom of one circle as pictured. Next, with the circle edges aligned, glue on the other circle by placing glue on the small squares (not the entire circle) so that the small squares are sandwiched between the circles. Let dry.
Once dry, curl down the top and side edge of one circle as seen in picture.
To make the universal cuff using masking tape, lay one long piece of masking tape (make it longer than expected to include the loop and securing it to the back), sticky side up, on the counter. Place another piece of tape directly on top, starting in the middle, and carefully work your way out to the ends. If using duct tape, fold the edges of the tape towards the inside. Cover any open sticky areas with a small strip of duct tape.
Position the universal cuff card holder over the fingers and secure the strap with additional tape along the back side, making sure the tape is snug against the fingers, but not too tight. The universal cuff should easily slip on and off the fingers.
Position the cards in between the two pieces of cardboard.
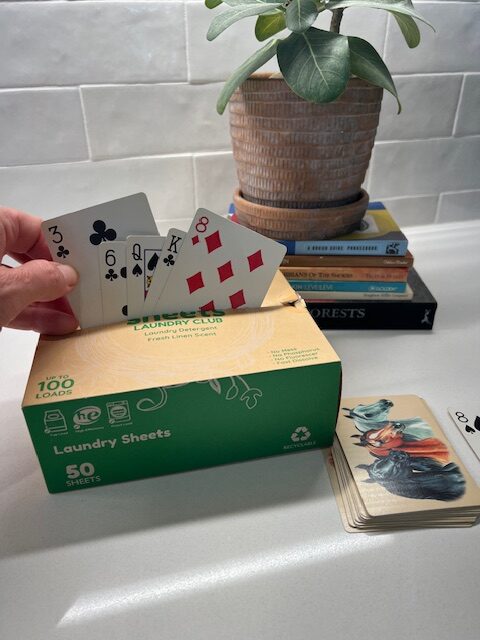
Create your own DIY adaptive handsfree stand card holder using a small box, box cutter, and a thin piece of cardboard folded into a triangular shape with "feet".