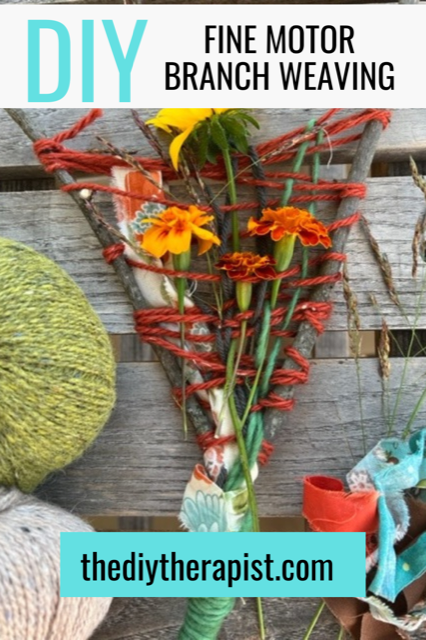
Branch weaving brings together the idea of loom weaving and nature fused into one. Learn to create your own branch weaving using repurposed materials, and items found in nature while encouraging the use of fine motor skills, manual dexterity, the pincer grasp, and bilateral coordination. A fine motor project bringing occupational therapy and nature together all in one.
This content is not intended as a substitute for medical advice, diagnosis, or treatment. Always seek the advice of your physician, therapist, or other medical professional regarding a medical condition or treatment. This content is for informational purposes only.
This post may contain affiliate links. As an affiliate, I may earn a small commission at no extra cost to you on qualifying purchases. Thank you for your support. See our full disclosure.
It’s that time of year in Tennessee when the seasons are beginning to change, mornings are a bit cooler, and the days are warm with a lovely, fall breeze. Sweet marigolds and mums are in bloom, and our hay field is full of tall, barely-can-see-over, Bermuda grass.
The kids and I went on our weekly nature walk like we always do, and spent the afternoon gathering wild flowers and beautiful shades of orange marigolds from the garden. We gathered handfuls of tall grass, examined rocks, and the pulled the random wild flower. I absolutely love this time of year.
We collected all of our nature finds, yarn, and scrap fabric and began preparing for this fine motor project. I love weaving, and completing this project with my kids reminds me of how much I really enjoy the process. And its a good sign when your kids want to do it again and again. I hope you enjoy this fine motor nature project as much as we did. Let’s get started.
What Is Branch Weaving?
Weaving
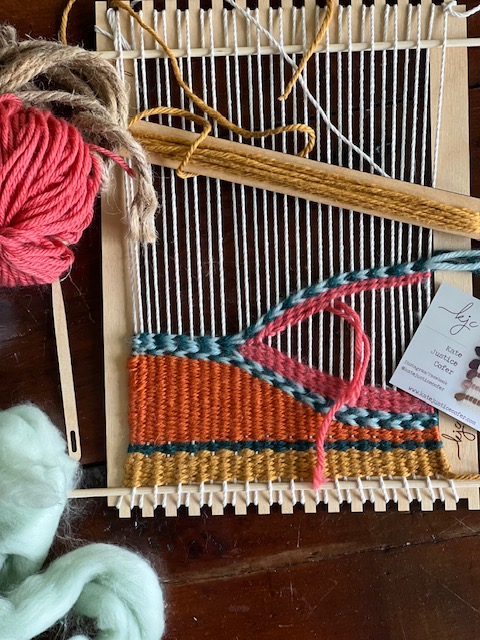
Today’s do-it-yourself project is a mini version of stand loom weaving. According to the book, “Weaving Made Easy”, author Liz Gipson defines weaving as the process of crossing taut warp threads with a weft thread in an over-under pattern. Today’s fine motor branch weaving project takes that same idea, and instead of using a loom, we will be using a strong Y shaped branch as the frame.
Weaving Terminology
If weaving is new to you, here are a couple important weaving vocabulary words to know:
Warp– The threads held at tight across the loom.
Weft– The yarn that is passed through the shed (the open space on the loom) of a threaded loom and beaten into place. It’s the decorative part of your weaving.
Details Of Branch Weaving
Branch weaving uses a Y shaped branch as the frame with yarn double wrapped around its branches connecting both sides of the branch. This creates the warp. I used a durable cotton yarn for the warp for extra strength.
Choose any decorative material that you like best for the weft (the weft is woven in and out of the warp; width-wise). It can be anything from ripped sheets, paper strips, ribbon, strips of old worn-out jeans, and of course, yarn.
I used strips of ripped fabric that I’ve had for quite some time along with yarn, and flowers from our garden. You can even add buttons and beads for an additional fine motor component.
Oh! And you know that old sweater in your closet that you no longer wear? The yarn can be unraveled by snipping the bottom edge of the sweater. Slowly unravel it until you have enough yarn set aside. Then keep the sweater for another project. Roll the yarn into a ball if you like so it doesn’t tangle. Or, of course, yarn can be purchased at your local hobby store.
Occupational Therapy Fine Motor Focus
As an occupational therapist, I love projects that incorporate a variety of fine motor skills. In addition, projects that get us into nature is a double bonus. Keep in mind, this is a great project for the whole family including not only kids, but older adults as well.
Fine Motor Skills Addressed In This Project
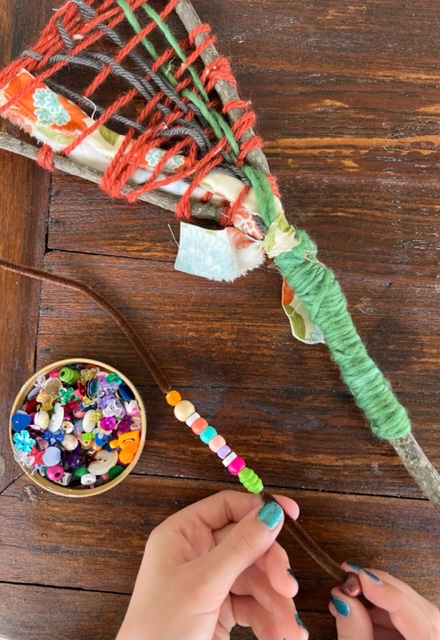
String beads on pipe cleaners for an added fine motor component.
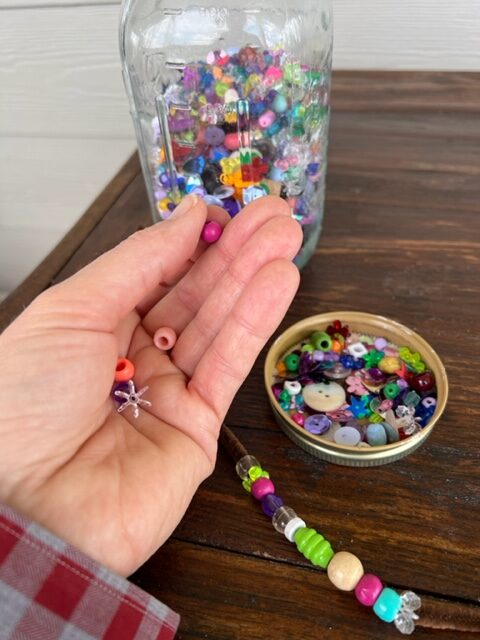
Work on the in-hand manipulation skill of translation by bringing beads from the palm of your hand to your finger tips.
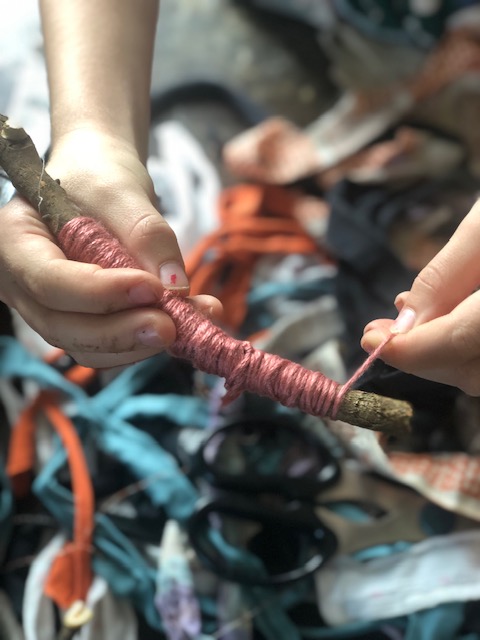
Work on bilateral coordination and the pincer grasp while wrapping the ends of your branch weaving with yarn or strips of fabric. Rotating the branch between your fingertips uses the in-hand manipulation skill of rotation.
Let’s dive in a little deeper into the specific fine motor skills used during this project:
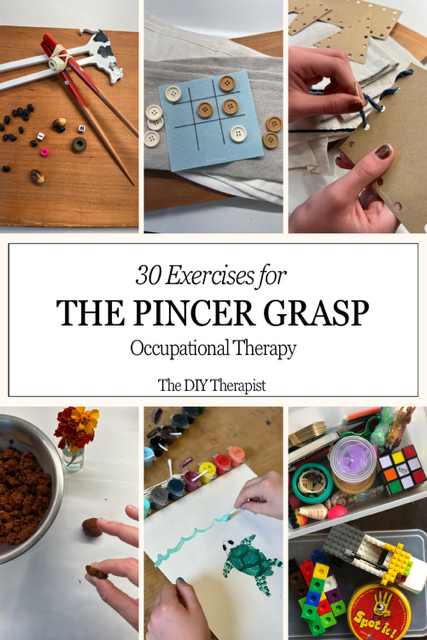
Pincer Grasp– the ability to hold an object between the thumb and the index finger such as when picking coins or beads, or turning a page in a book. Work on the pincer grasp while picking up small items such as beads. Even picking flower stems or plucking off leaves involves the pincer grasp. (see picture 1 above).
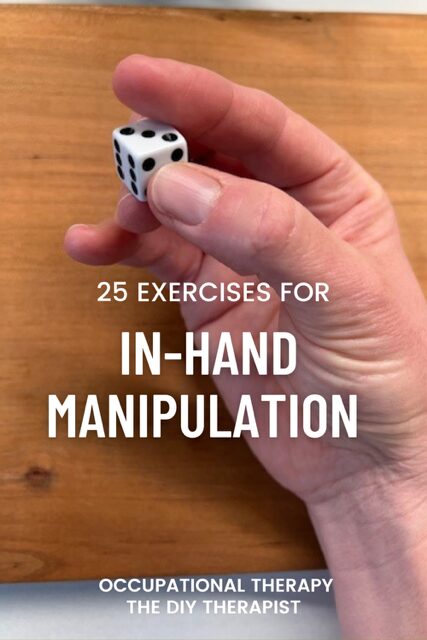
The In-Hand Manipulation Skill of Translation– allows you to move small objects from the palm of the hand to the fingertips, and vice versa. For example, you use translation when bringing coins from the palm of your hand to your finger tips when counting or making change. Add in this fine motor skill while stringing beads on to the weft (see picture 2 above). Rotating the branch between your fingertips while wrapping the branch with yarn or fabric uses the in-hand manipulation skill of rotation. (see picture 3 above)
Manual Dexterity– the ability to use hands and fingers in a skillful and coordinated manner to grasp and manipulate objects such as when tying a shoe. Work on manual dexterity while weaving yarn or thin pieces of fabric using either the fingers or a darning needle. Using a darn needle can make weaving through the different pieces of yarn a little easier. However, use caution when using a darning needle as injuries can occur.
Bilateral Coordination– the ability to use both sides of the body together, either together or separately, during an activity. Scissoring and shoe tying are both great bilateral coordination tasks. Work on bilateral coordination skills while:
Holding the weaving frame with one hand while weaving yarn or fabric with the other
Collecting yarn from an old sweater
Roll the collected yarn into a ball so that it doesn’t tangle
Rip old sheets – this is a great upper body strengthening and bilateral coordination skill.
Wrapping the branch with yarn (see picture 3 above)
Work on sequencing, bilateral coordination, manual dexterity, and motor planning while completing this fine motor task.
Rip strips of fabric or old sheets and t-shirts while working on upper body strengthening.
Sequencing– the ability to complete an activity from start to finish following step-by-step procedures such as when following a recipe. Work on sequencing skills while working through this fine motor project. Talk about what you are going to do and show a picture of the finished branch weaving. Discuss the materials needed and where you will find it. Write a simple step by step list (a great way to incorporate handwriting into a project). Use hand over hand assistance when needed to help teach how to weave.
Motor Planning– the ability to plan and carry out motor movements to complete an activity. Motor planning is required throughout the day ranging from bruising teeth, stepping up on a curb or while holding a pencil. Work on motor planning throughout this project whether while warping the branch frame, or while weaving.
Fine Motor and Upper Body Strengthening– Snipping and ripping old sheets or t-shirts is a great upper body and fine motor strengthening task (as well bilateral coordination). (see picture 2 above)
Upper Body + Fine Motor Resources:
Special Considerations
This project uses small items which can be a choking hazard for children under the age of 3 years or for anyone who may consume non-edible items.
Of course when using any sharp or pointed objects (scissors and the darning needle) carefully monitor children.
Caution!! Darning needles can cause injuries including eye injuries. Please use caution.
Pruning scissors should only be used by an adult when cutting branches or limbs.
This is a great do-it-yourself project for the entire family including children and older adults.
Keep in mind you can always adapt this project, making it easier or harder, for whomever is completing the weaving tapestry. Take into consideration an individual’s age, fine motor abilities, trunk control, and attention to task for this project. Divide up the project in phases if needed.
To make this project easier, spread out your warp stings so that there are fewer strands to weave. Use a bright-colored yarn. Use pipe cleaners as your weft.
To make this project more difficult, warp your strings so that all of the strands are closer together.
Use hand over hand assistance to help teach skills and give assistance as needed.
Setting up the frame by pre-stinging the warp may be needed for someone while others may be able to complete this nature project independently.
A great way to get kids outside and invested in a project is to get them involved from the start. Think about going for a walk to collect flowers, thin twigs, and other favorite nature finds that can be used for this project. Bonus tip, work on the pincer grasp while collecting small objects, or (have an adult) bring child safe scissors for snipping flowers and blades of grass.
How To Make A Branch Weaving
Materials Needed: Strong Y-shaped branch, scissors, pruning shears, yarn, strips of fabric, pipe cleaners, beads, and a darning needle.
Have an adult prepare branches by cutting a yarn branch and trimming any side branches.
Weave the weft, decorative yarn or strips of fabric, using your fingers or a darning needle while working on manual dexterity and bilateral coordination.
Materials Needed
Y shaped branch
Pruning shears for trimming branches
Yarn either new or unraveled from an old sweater for the warp
Decorative material such as 1 inch strips of old sheets or t-shirts, yarn, and/or flowers, leaves, tall grass strands, and even beads or buttons to string onto yarn of thin strips of sheets for the weft.
Scissors or child-safe scissors
Darning needle (optional)
Fork (optional) for assistance in pushing the weft pieces closer together
Pipe cleaners for stringing beads or to give more structure while weaving (optional)
Beads (optional)
Rip strips of fabric or old sheets and t-shirts while working on upper body strengthening.
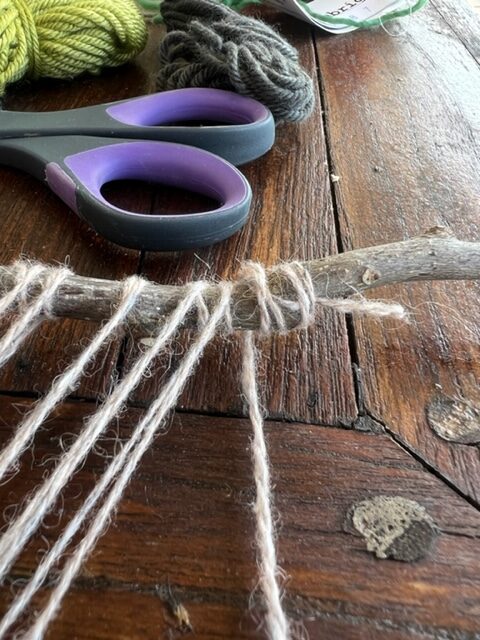
Tie one end of the yarn to the bottom of the frame.
Warp your Y branch double wrapping on each side. Wrap the ends of the stick if you choose for an additional fine motor component.
Instructions
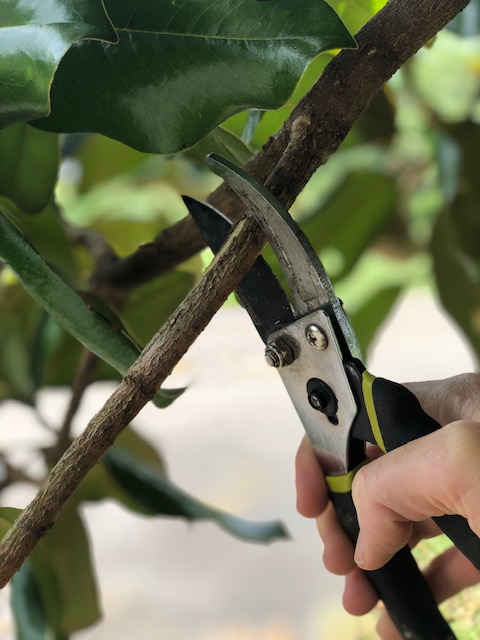
Select your branch. Choose a branch that contains Y shape or “fork”.
Cut off any smaller side branches using the pruning shears so that only the Y shape remains.
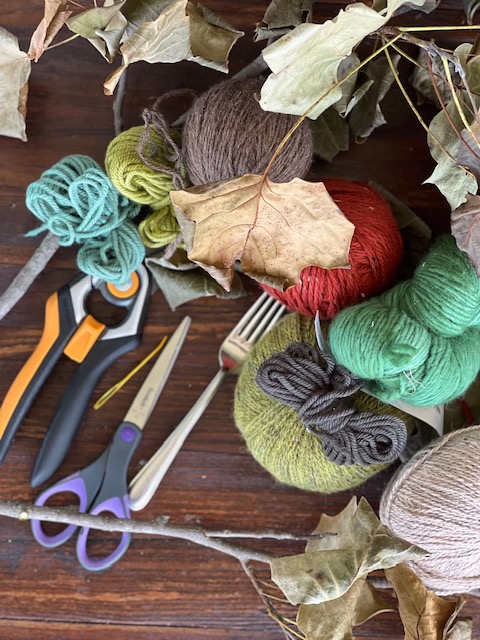
Collect and prepare supplies. Snip and rip fabric stripsfrom old sheets or scrap fabric, collect flower stems, thin twigs or branches, yarns with various textures and colors. Prepare fabric strips by either cutting the long strips with scissors or “snip and rip” the fabric. To do so snip approximately a 1 inch of fabric then proceed by ripping the sheets or t-shirt in opposite directions. Both sheets and t-shirts should rip easily when ripped in the correct direction. For example, t-shirts should be ripped in the direction as if going along the waistline. The weft material can be shorter strips for changing colors or materials frequently, or longer strips for a continuous weaving look. (picture 1 above)
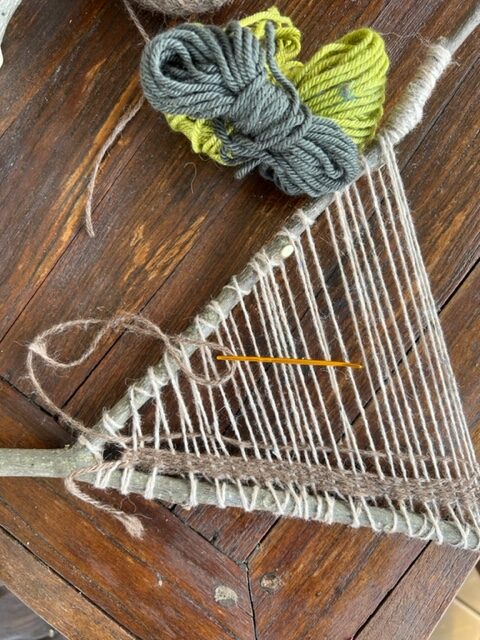
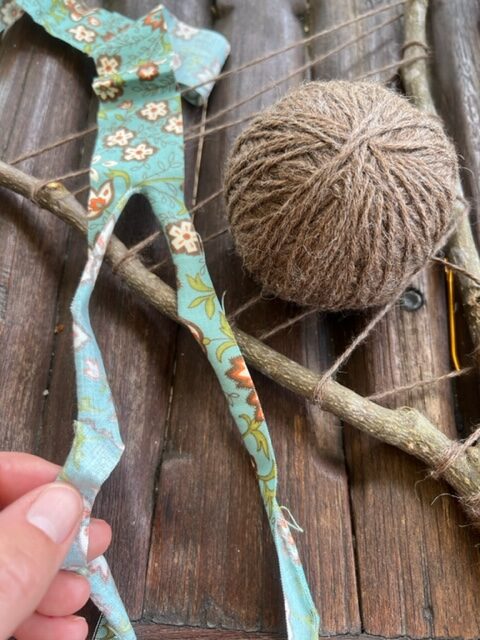
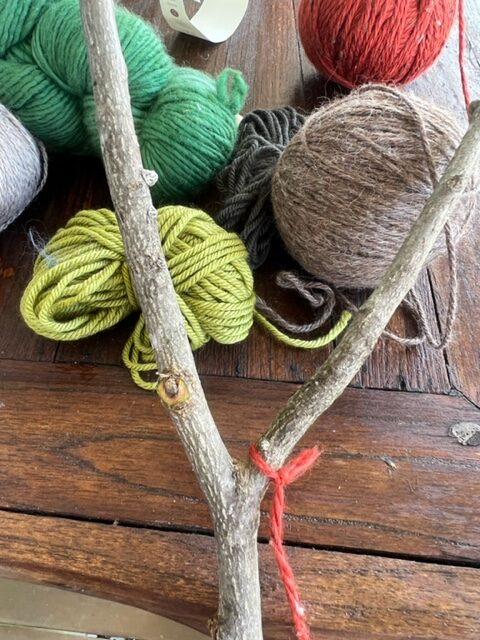
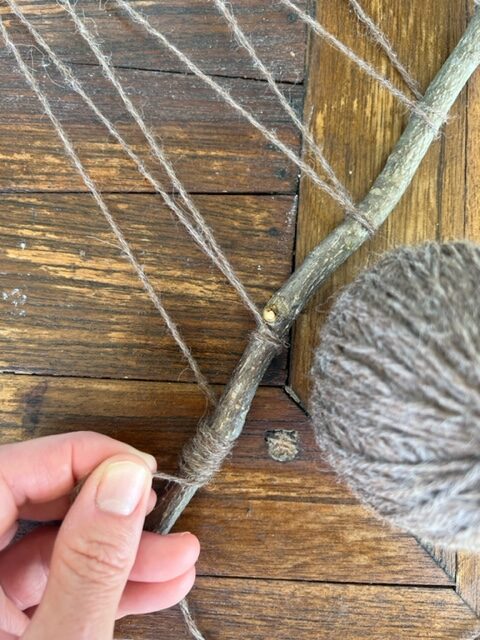
To warp your branch loom: First, to warp the branch, cut approximately a 3 foot piece of yarn- adjust as needed for your frame size and the number of warp strands you want. Tie one end of the yarn to the bottom leg (see picture 2 above), then bring the string up to the top leg wrapping twice to keep the yarn in place. Then proceed diagonally leaving a small space (the amount of space depends on your preference for number of warp strands) between the warp strings. Continue warping the frame making sure to wrap the leg twice every time. Tie a knot at the end to secure when you have finished warping the entire Y branch.
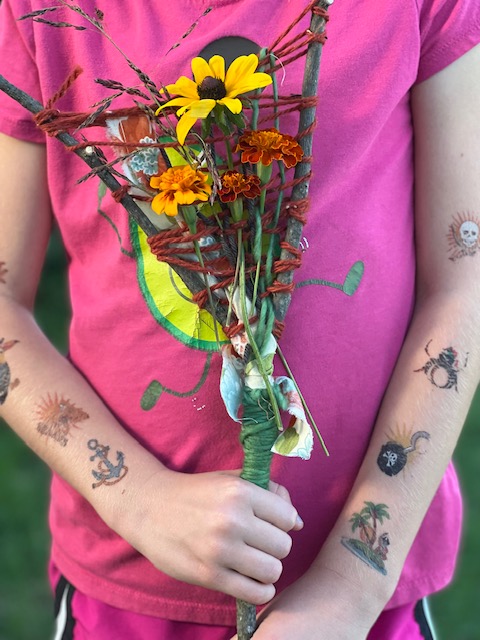
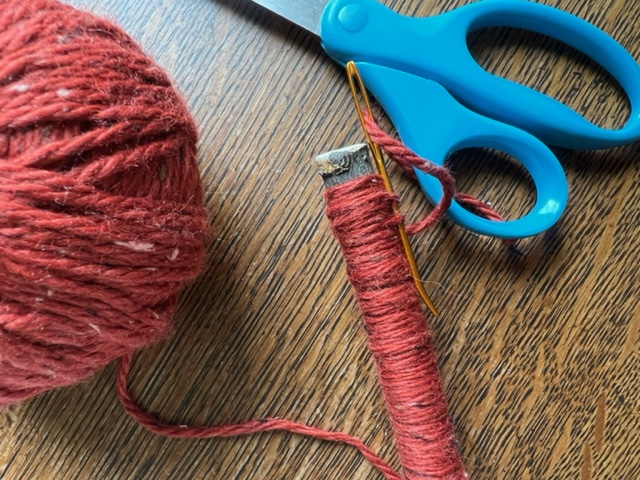
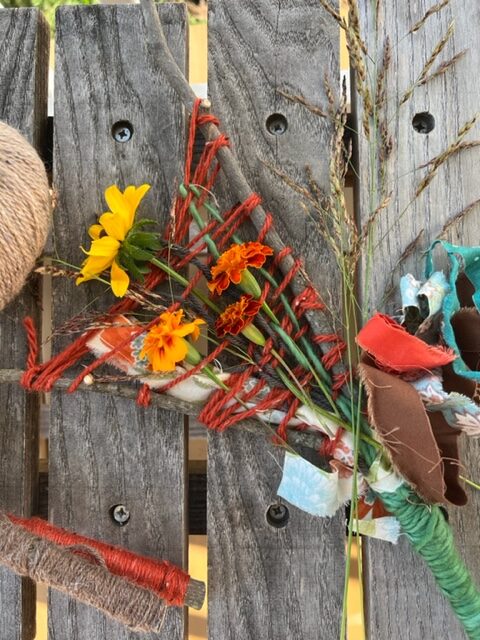
Now it is time to start weaving. The weft material can be made of shorter strips for changing colors or materials frequently, or longer strips for a continuous weaving look. Weave over and under the warp strings using either your fingers or a darning needle. (picture 1 below) Use a fork to beat the weft strings close together (optional). Wrap the handle of your branch weaving if you choose. Secure the ends by making a knot or slip the yarn under the wrapped yarn using a darning needle like seen in picture 2 below. Weave in flowers and small twigs, etc. if you choose. (picture 3 below)
*If you wove with fresh flowers and plan to keep the branch weave, hang the frame upside down so that the flowers dry properly. I hung my frame upside down for a couple weeks, but yours may need more or less time.
Weave the weft, decorative yarn or strips of fabric, using your fingers or a darning needle while working on manual dexterity and bilateral coordination.
Secure in any loose ends by tying a knot or using a darning needle to slip the loose end under wrapped, tight threads.
Weave flowers, tall pieces of grass, thin twigs, plants stems, or wild flowers into your weaving.