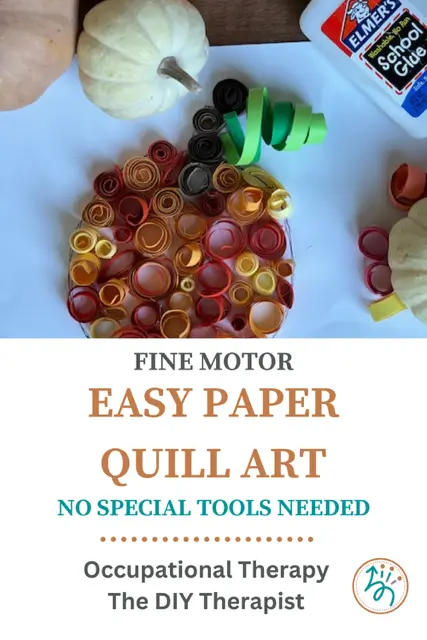
This adapted version of paper quill art is perfect for Halloween. Plus it’s a great occupational therapy-based, fine motor project for kids and adults alike. This project focuses on the encouraging the use of specific fine motor skills all while having fun creating. Such fine motor skills include the pincer grasp, in-hand manipulation, and bilateral coordination skills. I’ve adapted this project so that no special tools are needed, and is more friendly for all ages and fine motor abilities.
This content is not intended as a substitute for medical advice, diagnosis, or treatment. Seek the advice of your physician, therapist, or other medical professional regarding a medical condition or treatment. This content is for informational purposes only. This post may contain affiliate links. As an affiliate, I may earn a small commission at no extra cost to you on qualifying purchases. Thank you for your support. See our full disclosure.
I’ve been wanting to try my hand at paper quill art. This adapted version I created is more friendly for all ages, doesn’t require any special tools, nor special glue or paper. Yes, the coils aren’t as tight and neatly formed as some of the beautiful pieces seen online, but this version is perfect for my purpose. Plus, I love the unruliness of the paper coils!
What Is Quill Art?
Quill art is an art form that uses thin strips of paper that are rolled, shaped, and then glued to make a decorative art design. Rolled paper is often shaped into circular coins, or pinched into different shapes. Designs can include but are not limited to flowers, snowflakes, leaves, and creative patterns.
Typically thin strips of paper are rolled using a slotted quilling tool. However, instead of using this tool, we will be using items typically found around the home- a pencil or a dull-ended skewer. Plus you can even use your index finger for creating paper coils. The paper coils will not be as tight as when using a slotted quilling tool however. Even without the tool, the coils still make adorable art.
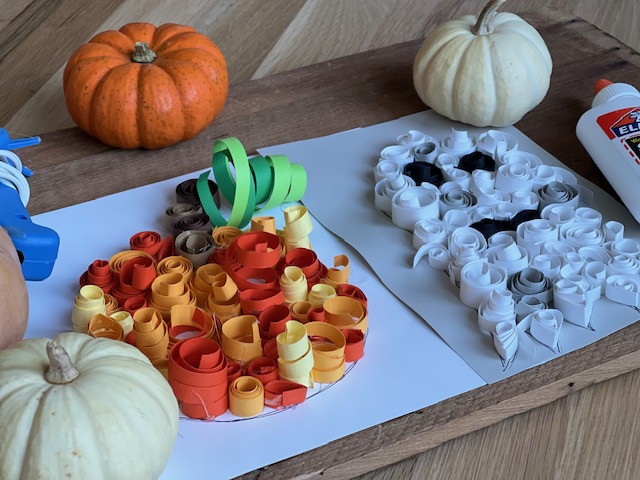
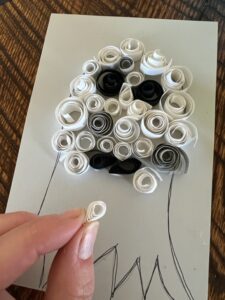
Both the pumpkin and the ghost were made using cardstock. Add a dab of hot glue to secure the ends if you choose.
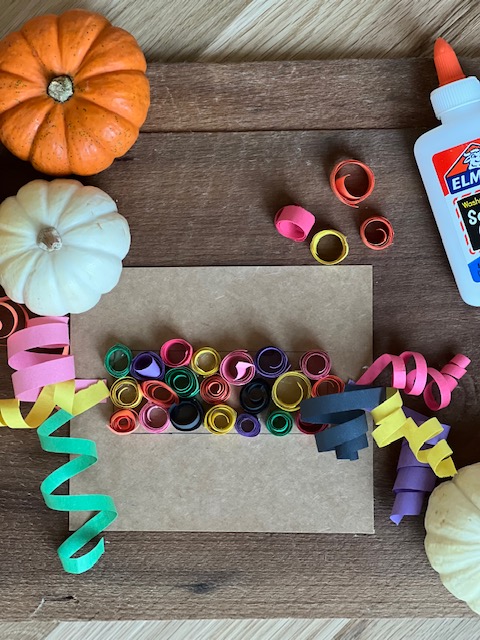
The candy picture is made using construction paper coils with a thin cardboard background. The coils of the construction paper are a little looser; therefore, you can add a small dab of hot glue to secure the end of the coil if you prefer.
What Type Of Paper Should Be Used in Quill Art ?
According to Quilled Creations, a heavy text paper is typically used for quill art. Heavy text paper is paper that is heavier than printer paper but lighter than cardstock. I, personally, do not keep heavy text paper on hand so instead I used cardstock and construction paper for this project.
These two types of paper worked great for my purposes in adapting this project. However, the coils do spread a little bit. If you would like to avoid having the coils spread then add a dab of hot glue to the end to secure before putting the coil in place.
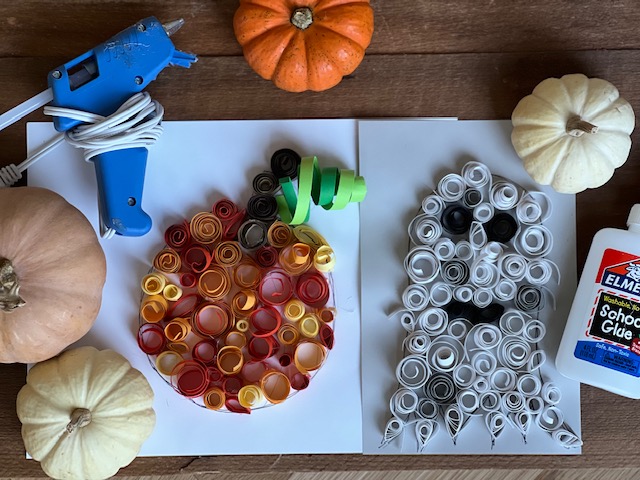
The pumpkin is made using hot glue and cardstock paper. The ghost is made using Elmer's all-purpose glue and cardstock paper. Squeezing an Elmer's glue bottle is an added fine motor strengthening exercise. Of course, extra dry-time is needed for Elmer's all-purpose glue.
What Kind Of Glue Should Be Used For Paper Quill Art?
Quilled Creations states quill art traditionally uses a quick drying, clear tacky glue such as Elmer’s Craft Bond Glue or Aleene’s Tacky Glue.
For today’s project, we are using either hot glue or Elmer’s all-purpose glue. These types of glues are not typically recommended, but for our purposes, they both serve well. Hot glue works well since it dries quickly, plus it can secure the ends. On the other hand, Elmer’s all-purpose glue works well as long as the pieces remain untouched during the drying period. Furthermore, when using Elmer’s glue, the coil pieces do spread more, but a dab of hot glue will fix this. Check out the photos above for reference regarding glue.
*Keep in mind, if you are looking to complete a traditional quill art project, you will need speciality glue, paper, and a quilling tool as mentioned above.
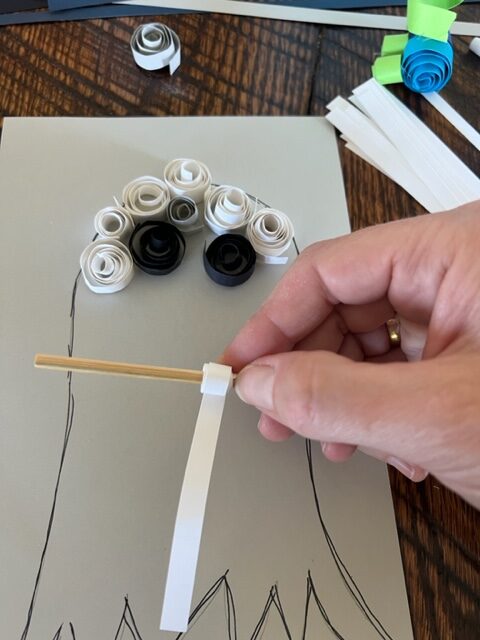
Make coils by rotating the skewer or pencil.
Additionally, teardrop shaped coils are made using the pincer grasp. Pinch one end of the coil to form the teardrop. Secure with a dab of hot glue.
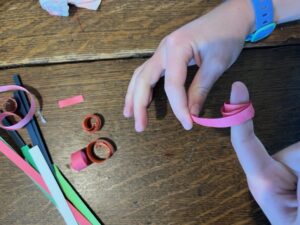
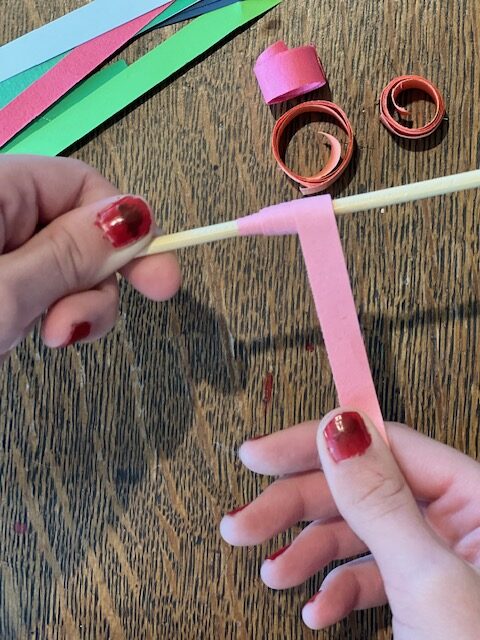
To make a spiral, wrap the skewer or pencil with a paper strip along the length of the stick. Rotate the skewer between the pads of the index and thumb to work on in-hand manipulation.
How Do I Make Paper Quills?
I did not purchase a slotted quilling tool, but instead my kids and I used either a pencil, a dull-ended skewer, or our even our index fingers to coil paper strips. Use whichever technique is best for you and your goals for this project.
Make circular coins by wrapping the pencil, skewer, or your finger with thin paper strips. You can also pinch one end of the coil to create a teardrop shaped quill (see picture above).
* Make sure to cut the skewer in half, and discard the pointed end before beginning this project to avoid any injuries. Upper body and trunk control is needed during this project to avoid skewer or pencil related injuries. Create coils using an index finger instead of a skewer or pencil to avoid potential injuries.
Occupational Therapy Fine Motor Focus
As an occupational therapist, I love art projects that incorporate a variety of fine motor skills like this quill art project. Keep in mind, paper quill art is not only a great project for kids, but for individuals of all ages. It is also a good project for older adults and those in adult rehab working towards improving their fine motor skills.
Fine Motor Skills Addressed In This Project
Work on the pincer grasp while wrapping a pencil, skewer, or finger.
Additionally, teardrop shaped coils are made using the pincer grasp. Pinch one end of the coil to form the teardrop. Secure with a dab of hot glue.
Pincer Grasp
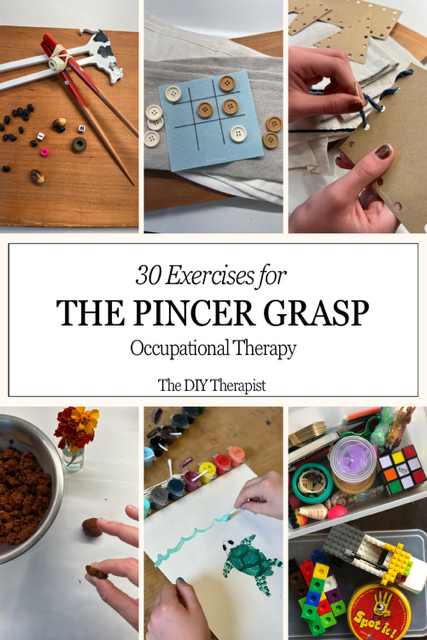
The pincer grasp uses the pads of the index finger and thumb to grasp objects. Furthermore, this type of grasp is important for handwriting skills, picking up small objects, and dressing skills such as manipulating buttons and zippers. This project uses the pincer grasp to pick up the small pieces of paper, coiling the paper strips, and when making teardrop shaped coils. (Picture 1 above)
Bilateral Coordination Skills
Bilateral Coordination is the ability to coordinate both sides of the body together in an activity. When both sides of the brain are communicating effectively, good bilateral coordination skills are seen. Bilateral coordination is an important life skill needed for completing tasks and activities throughout the day. For example, bilateral coordination is needed for food prep (ie: peeling potatoes and mixing a bowl of dough), buttoning, sports, and school-based skills such as scissoring.
Throughout this project, bilateral coordination is used. Wrapping paper strips around a pencil, gluing coils to the paper, and while scissoring are all examples of this skill.
Work on the skill of rotation while wrapping paper strips with a skewer or pencil. Hold the skewer or pencil between the pads of the index finger and thumb and rotate.
Make coils by rotating the skewer or pencil.
To make a spiral, wrap the skewer or pencil with a paper strip along the length of the stick. Rotate the skewer between the pads of the index and thumb to work on in-hand manipulation.
In-Hand Manipulation Skills
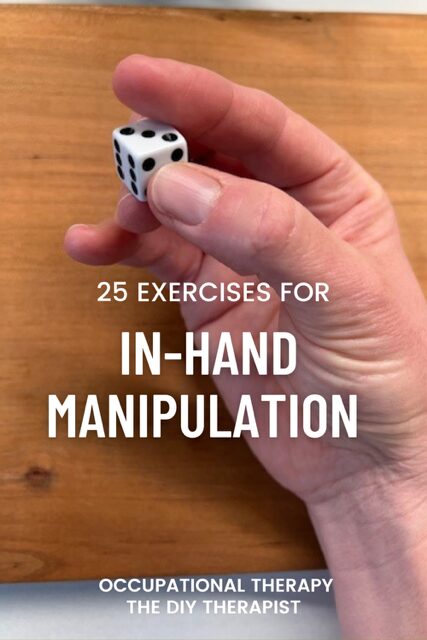
The in-hand manipulation skill of rotation is the ability to turn an object between the pads of the thumb and index finger such as when rotating a pencil. This is known as simple rotation. Complex rotation is the ability to turn an object from end to end such as when flipping a pencil from the lead to the eraser.
The skill of simple rotation is seen in this project when wrapping the paper strips around a pencil or skewer (picture 2 above). Practice rotating the pencil or skewer between the pad of the index finger and thumb while holding the strip of paper steady.
You can add the skill of complex rotation by practicing flipping a pencil from the lead end to the eraser end.
Fine Motor Strengthening
When squeezing a bottle of Elmer’s glue or pinching coils into a teardrop shape, each of these tasks are a good fine motor strengthening exercise.
Additionally, teardrop shaped coils are made using the pincer grasp. Pinch one end of the coil to form the teardrop. Secure with a dab of hot glue.
Always use caution when using a hot glue gun. Watch out for skin burns, and hot glue guns are a potential fire hazard if left plugged in too long. Only adults should use a hot glue gun.
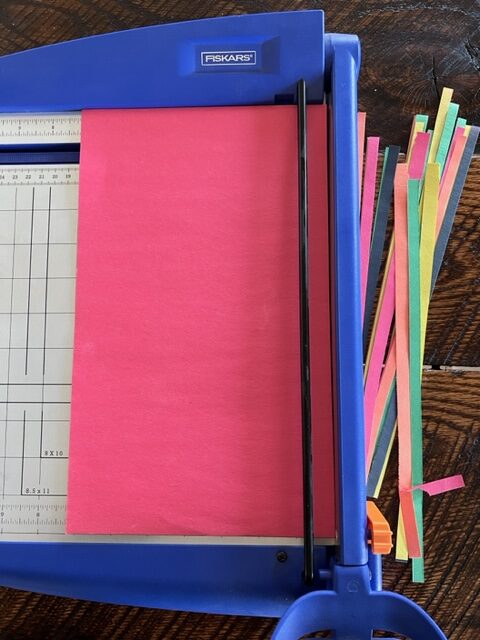
Only adults should use the paper cutter.
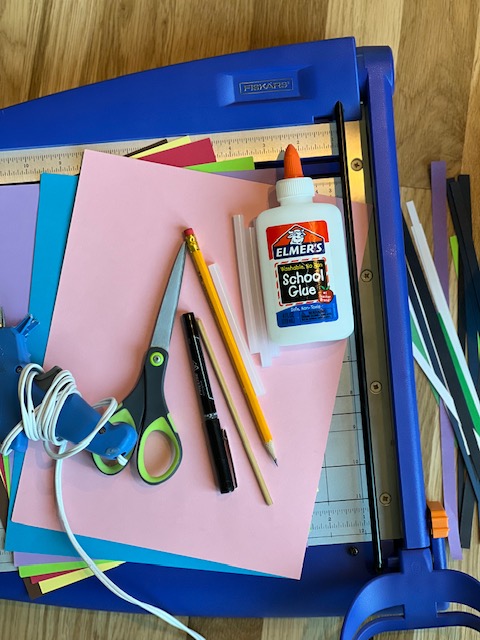
Paper strips can be made using a paper cutter or scissors. I cut paper strips approximately ¼” wide.
Cut the skewer in half, and discard the pointed end to help make it more manageable and to help avoid injuries.
To avoid skewer or pencil related injuries, upper body and trunk control is needed. Create coils using an index finger instead of a skewer or pencil to avoid potential injuries.
Adjust the size of your pumpkin or ghost based on attention level, time constraints, fine motor skills, and age. Keep in mind, this project does take additional time to complete due to coiling the paper stripa, gluing, and cutting paper strips if doing so using scissors.
Cardstock or a piece of cardboard as base for project
Glue of choice (Elmer’s Craft Glue Bond, Aleene’s Tacky Glue, Elmer’s All Purpose, or a hot glue gun)- see note above
Scissors or paper cutter
Dull ended or unsharpened pencil or skewer (though use of the index finger is also an option)
Cut approximately 1/4" paper strips using a paper cutter or scissors. Only adults should use the paper cutter.
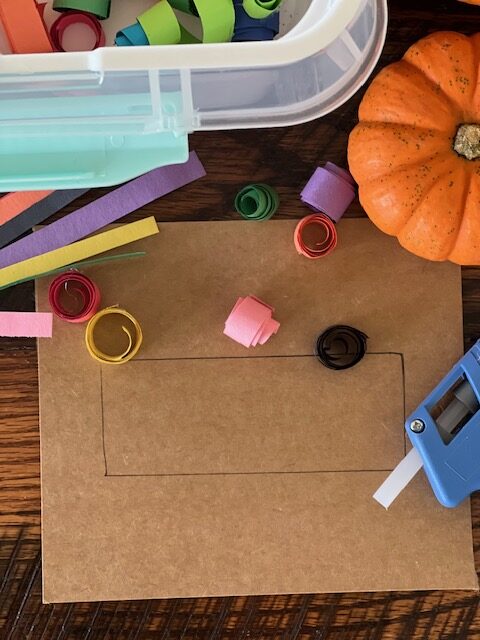
Draw a circle and stem for the pumpkin. or a ghost, or rectangle for the candy piece.
Make coils by rotating the skewer or pencil.
Instructions
Prepare paper strips by cutting paper into approximately ¼” wide strips using a paper cutter or scissors. Only adults should use the paper cutter.
If using a skewer, cut in half and discard the pointed end.
Draw a circle and a stem for the pumpkin, a ghost, or a rectangle for the piece of candy on a cardstock or cardboard. Adjust the size of your pumpkin or ghost based on attention level, time constraints, fine motor skills, and age. This project does take additional time to complete due to coiling the strips, gluing, and cutting strips if doing so with scissors.
Wrap one strip at a time around your index finger, a pencil, or skewer being careful not rip the paper strips. Gently release the coil.
Secure the end, if you choose, with hot glue. Glue the coil to the base using your glue of choice (see note above).
Repeat steps until your pumpkin, candy, or ghost is filled. Let glue dry as needed.