Follow this tutorial and learn a quick and easy way to make your own weighted stuffed animal for a child with sensory processing differences. This do-it-yourself tutorial needs just a few items for an inexpensive solution to this costly sensory tool found online.
This content is not intended as a substitute for medical advice, diagnosis, or treatment. Always seek the advice of your physician, therapist, or other medical professional regarding a medical condition or treatment. See full disclosure here.
This post may contain affiliate links. As an affiliate, I may earn a small commission at no extra cost to you on qualifying purchases. Thank you for your support. See our full disclosure.
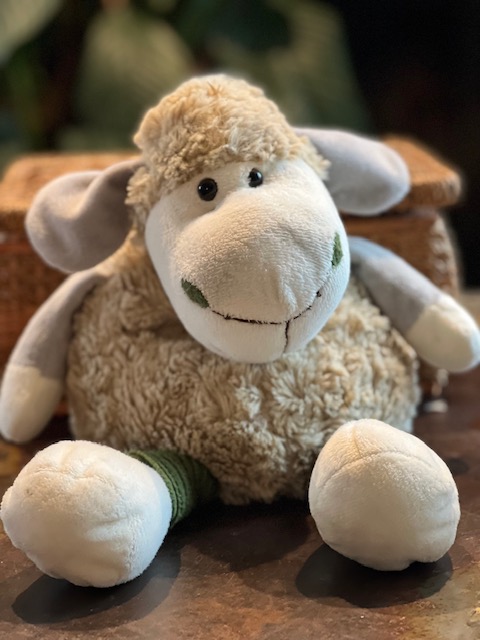
Today, I am going to share with you a sensory tool that pediatric occupational therapists sometimes use and recommend. These weighted stuffed animals are not only super cute, but they can also help organize the sensory system for activities such as play and table work.
This project is simple and quick to make. It took me about 10 minutes from start to finish. We will only need a few things to make this adorable therapeutic tool. So let’s get started.
What Is A Weighted Stuffed Animal?
A weighted stuffed animal is a stuffed animal filled with plastic poly-pellets instead of the typical poly-fill that makes stuffed animals and pillows so soft and cuddly. Don’t worry, it’ll still be cuddly. It’ll just have a bit of added weight to help make this sensory aid a calming device for kids.
If you would like to purchase a weighted stuffed animal, check out this super cute teddy. Make sure to purchase a weighted stuffed animal that is appropriate for your child’s weight. See the section below “Things To Consider Before Making This Project” for details regarding weight of the stuffed animals. Always discuss with your personal occupational therapist before purchasing or making your own weighted stuffy.
What Is The Purpose Of A Weighted Stuffed Animal?
A weighted stuffed animal is a type of sensory aid pediatric occupational therapists, at times, use during therapy sessions. Furthermore, occupational therapists also sometimes recommend children use this sensory tool at home or while at school to address specific sensory processing needs. Both adults and children alike may benefit from the use of weighted lap pads, stuffed animals, or blankets when prescribed by their therapist. A weighted sensory knot ball is another great addition to your sensory support tools.
Whether positioned on the arm, leg, shoulder, or back, a weighted stuffy provides our bodies with deep touch pressure. Deep pressure can help our sensory systems relax, and regulate itself all while using a soft and cuddly weighted stuffed animal.
Whether the goal is better focus during school hours, improved self regulation skills, increased participation in activities, or decreased anxiety, a weighted stuffed animal may be a tool that might be helpful to you. Check with your personal occupational therapist to see if this sensory device is a good fit for you or your child.
Where To Purchase?
No time to make a weighted stuffy? Check out this weighted stuffed animal from Fun and Function. Fun and Function offers a variety of adorable animals including a teddy bear, sloth, snake, starfish, hedgehog and lizard. Check out the different stuffies using the link below. Thank you for your support!
Fun and Function also offers a super fun weighted sensory knot ball. This sensory tool would make a great addition to sensory rooms and classrooms as well as at home. Roll back and forth or toss to a partner, participate in heavy work activities, and gently roll over the back and legs for calming deep pressure. Check out the link below for more details. Thanks again for your support.
Evidence Based Research and Weighted Sensory Tools
It is important to note that more evidence based research is needed in this area of occupational therapy. Weighted sensory tools such as weighted stuffed animals, weighted blankets and lap pads, and weighted vests need additional research to support its use although parents and therapist alike report benefits. Weighted sensory devices are still considered experimental and should be only be used under the direct instruction of your personal occupational therapist. Here are some additional research articles regarding the efficacy of weighted blankets published by the American Journal Of Occupational Therapy.
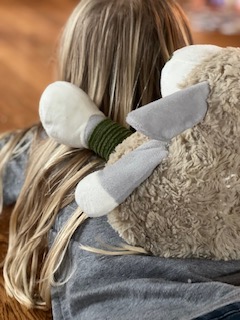
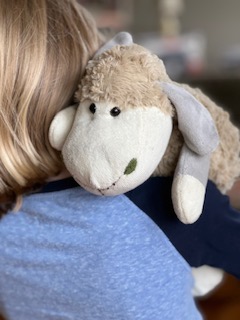
Relax with your weighted stuffed animal placed on your back.
Walk around the house with your weighted stuffed animal positioned on your shoulder.
Ideas For When To Use A Weighted Stuffed Animal
Weighted stuffed animals can be placed in a child’s lap, across the shoulders, or on the back (do not place it on the belly). Weighted stuffed animals can also be used in a variety of settings which may help calm the sensory system for improved participation in activities such as while:
Eating meals
Waiting for an appointment
At school, if approved by their teacher
Riding in the car
Doing homework
At the dentist
Getting a haircut
Watching TV
During transitions such as when changing activities
Playing a board game
During activities that might cause anxiety or heightened sensory defensiveness
** Do not use a weighted stuffed animal while sleeping due to suffocation and strangulation risks**
8 Fun Ways To Use Your Weighted Stuffed Animal To Encourage Play and Heavy Work
Heavy work is a calming sensory technique used by occupational therapists to organize the sensory system. Furthermore, heavy work consists of activities that provide input to the proprioceptive system (input to the muscles and joints). Activities such as wheelbarrow walking, and pushing or pulling heavy objects are all considered heavy work activities. Here are 8 fun ways to use heavy work and your new super cute weighted stuffed animal:
Play dress up with your cute new stuffy. Have your child put on and take off their stuffed animals clothes. Work on placing arms through sleeves, buttons and snaps, and zippering.
Gently toss back and forth with a partner within a short distance depending on the child’s age and catching abilities.
Go on a short walk or hike carrying the weighted stuffed animal.
Push or carry the weighted stuffed animal across hardwood or laminate floors in a game of relay races
Place in a laundry basket along with other stuffed animals and push across the carpet. Think “animal train.”
Make an obstacle course using the weighted stuffed animal.
Exercise using the weighted stuffed animal (with proper body mechanics). Think shoulder press using both arms and hands at the same time. Do push ups, bear crawl and/or slither like a snake with the stuffed animal riding on the child’s back.
Use the weighted stuffed animal as a clean up buddy.
Things To Consider Before Making Your Own Weighted Stuffed Animal
Dried Beans And Rice vs. Plastic Poly-Pellets
Dried beans and rice are not machine washable. If spills were to happen, even if its water, contamination of the material could happen causing mold to grow. Plus bugs and other pests may be on the lookout for something to eat. It is recommended to use plastic poly-pellets as it is machine washable if needed.
On the flip side, I do prefer a environmentally green alternative to plastic poly-pellets. At this time I am unaware of an eco-friendly alternative to plastic beads to make weighted stuffed animals. If you know of a eco-friendly alternative please let me know in the comments and Ill make sure to update this post.
Typically, you can find plastic poly-pellets online or at your local hobby store such as Hobby Lobby. Do not use fishing weights as they are typically made using lead.
Other Helpful Tips To Keep In Mind
Weighted stuffed animals are for children aged 3+ years.
Children should weigh 30 pounds or more before using.
Weighted stuffed animals are a choking hazard for children under the age of 3 or for anyone who may chew on non-edible items.
Do NOT allow your child to sleep with a weighted stuffed animal due to suffocation and strangulation risks.
A weighted stuffed animal should weigh no more than 5% of your child’s body weight. Typically weighted stuffed animals weigh between 2-5 pounds.
Children should always be able to lift the weighted stuffed animal independently without any trouble.
Do not place it on the belly due to potentially harming internal organs.
Discuss with your occupational therapist whether a weighted stuffed animal is a good fit for you or your child. Find out how much weight is appropriate for your child as well as use time. It is vital to discuss your child’s case with your occupational therapist before using any type of weighted sensory tool.
Whether your child chooses a favorite stuffed animal from your home or chooses one at a store, make sure your child tolerates the feel of the fur before purchasing or ripping threads.
I prefer sewing the stuffed animal back together by hand because the plastic pellets can be difficult to keep out of the way of the sewing machine needle. If you do not feel confident in your hand sewing skills, hand sew back over the stitches a 2 or 3 more times to make sure your stitches are secure.
Weighted stuffed animals made with plastic poly pellets are machine washable. Before washing, I recommend placing the weighted stuffed animal in a pillowcase and close using a rubber band. This will help prevent additional wear and tear on the stuffed animal. Spot clean with a damp towel as needed.
Do not use fishing weights as many are made from lead and are unsafe.
How To Make Your Own Weighted Stuffed Animal
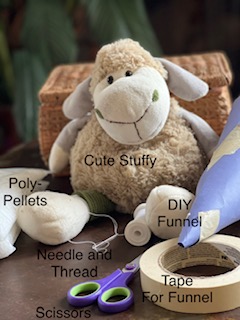
Materials Needed
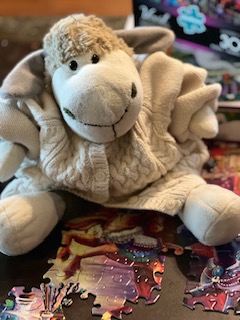
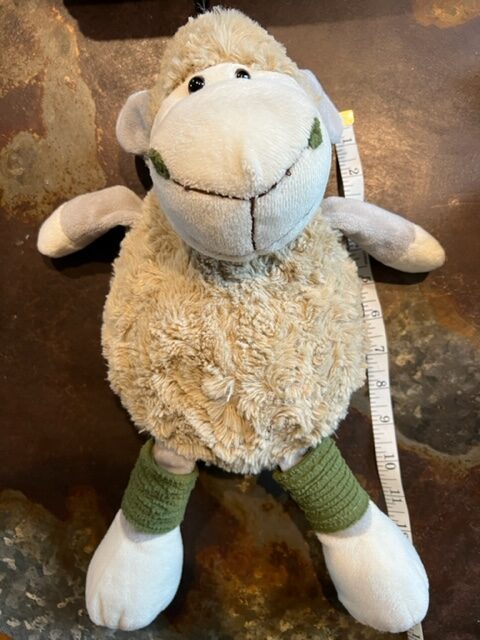
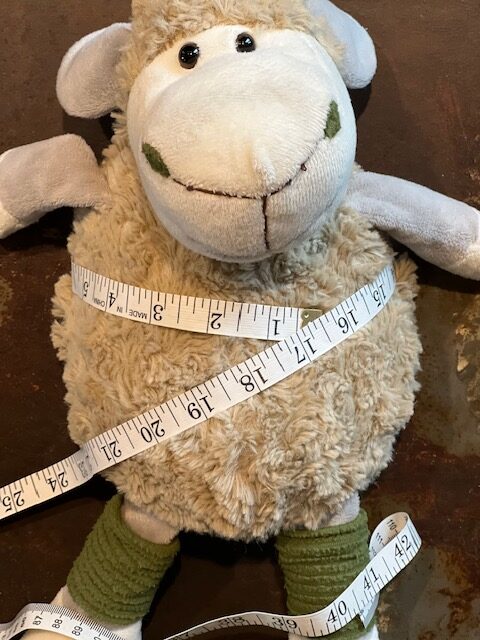
Stuffed animal of choice making whether this is a new stuffed animal or a long time friend. If new, make sure your child tolerates the texture of the stuffed animal’s fur. Wash if needed before beginning this project. For reference, the stuffed animal I used measures approximately 16” long, and has a belly circumference of 16”. After adding poly-pellets, my stuffed animal weighs 2.5 pounds. (see pictures below)
Seam ripper or small thin-bladed scissors for cutting threads.
Small funnel or make a DIY construction paper and tape funnel (see picture above)
Stuffed animal length for reference
Belly circumference for reference
Instructions
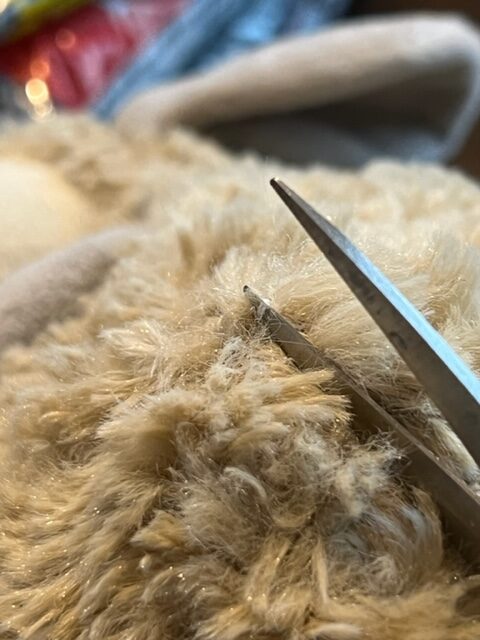
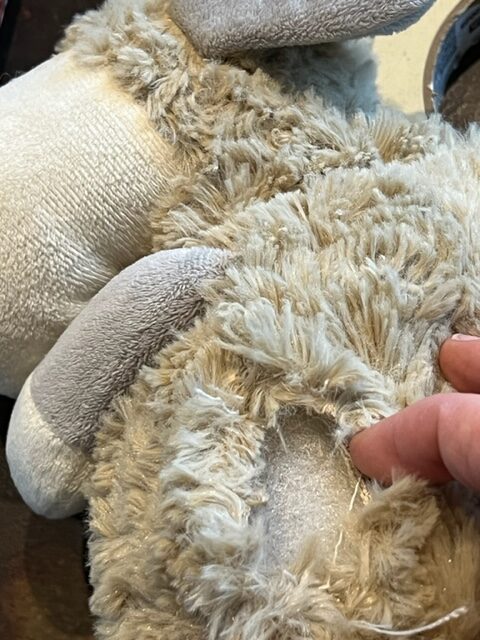
Seam rip the main, long seam either along the back of the stuffed animal or on its side depending on the stuffed animal you are using. Once you cut the first stitch, the other stitches will come loose more easily by gently pulling the two sides of fabric apart. Snip again as needed. I made an approximate 3.5” opening. (see pictures below)
Gently remove all stuffing. Discard or save for another project. I kept the stuffing in the head, as well as the arms and legs intact. Therefore, I did not fill arms, legs, and head with poly-pellets. Filling the head and limbs with poly-pellets is your personal choice. I chose not to fill my stuffed animals arms, and legs as they are fairly small, and didn’t want the head to be top heavy.
Fill your stuffed animal with the correct weight amount of the plastic poly beads using a funnel. To make your own funnel, wrap a piece of construction paper around itself and secure it with tape as seen in the “materials picture”.
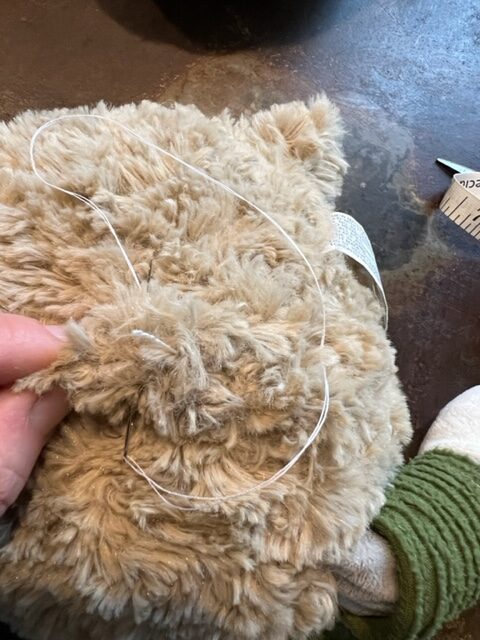
Once filled to the correct weight, hand sew the ripped seam making sure to secure each end. I used a whip stitch. If you are not confident in your hand sewing skills, go back over your seam one or two more times to make sure all is secured. You can also use a sewing machine, to sew together the open area. When doing so, make sure to keep the weighted material is away from the sewing machine needle.
Seam rip or cut either the main back or side seam on the stuffed animal using sharp thin scissors.
Cut or seam rip a approximately a 3.5" opening to remove stuffing and fill with poly pellets.
Stretch Me Kick Bands also known as sensory kick bands- these are great for busy, fidgety bodies both in the classroom and at home to help focus attention.